

Travel-a-Go-Go

Travel Without a Ticket Discover the World Through Its Food, Culture and Stories — One Destination at a Time

Travel Without a Ticket Discover the World Through Its Food, Culture and Stories — One Destination at a Time

Travel-a-Go-Go Travel’s Global Kitchen

Bringing the World We’ve Traveled…to Your Dining Table.

What If You Could Travel the World Tonight?

There is something extraordinary about travel.

We remember the places we see—the architecture, landscapes, beaches, mountains, and famous landmarks.

We remember the people we meet.

We remember unfamiliar sounds, languages, and traditions.

But very often, long after we’ve returned home, we remember something else.

We remember what we ate.

The pizza from the little restaurant in Naples.

The moussaka overlooking the blue waters of Greece.

Tacos prepared on a busy street in Mexico.

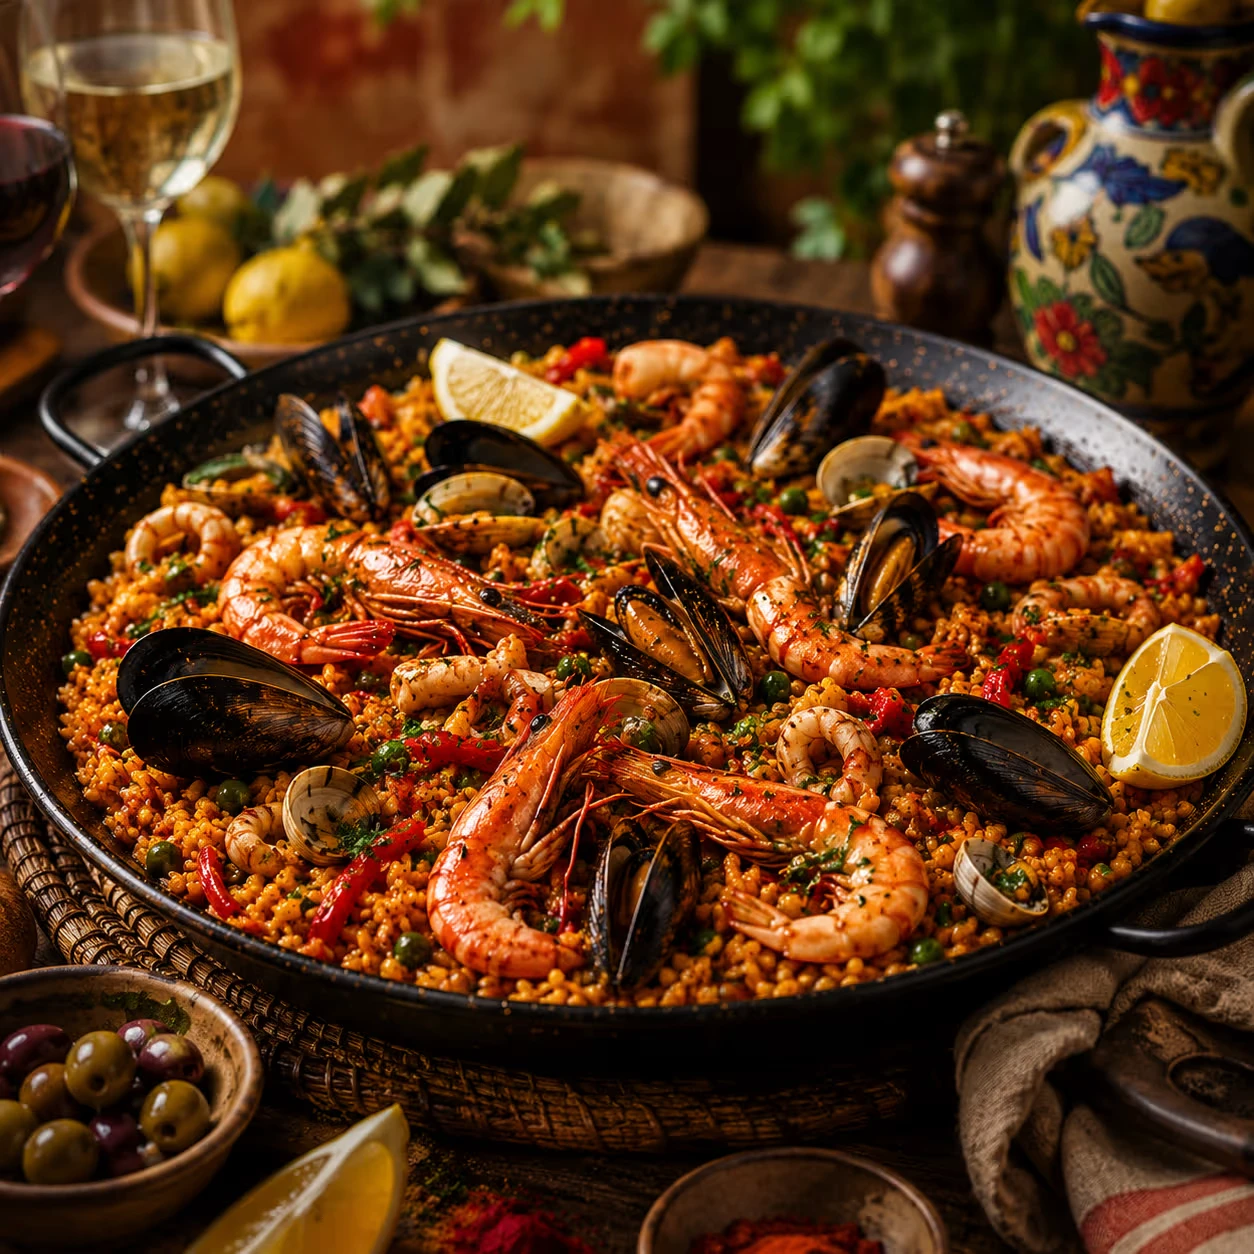
A steaming pan of paella arriving at the table in Spain.

A slow-cooked meal accompanied by a glass of wine somewhere in the French countryside.

Food has an extraordinary ability to capture a place.

An aroma can bring back a memory.

A flavor can remind us of a street we once walked.

And sometimes, tasting something we’ve never experienced before can make us begin dreaming about a place, we’ve never been.

That is the idea behind Travel-a-Go-Go Travel’s Global Kitchen.

And it’s why we call this journey…

Travel Without a Ticket.

🌎 Every Recipe Has an Address

Food doesn’t simply come from a cookbook.

It comes from somewhere.

Climate determines what can be grown.

Geography determines what ingredients are available.

History introduces new foods and cooking techniques.

Trade brings spices from distant places.

Religion and tradition influence what families prepare for celebrations.

Economic circumstances turn simple ingredients into beloved comfort foods.

And generation after generation, families adapt those dishes until food becomes part of the identity of a place.

That’s why Global Kitchen will never simply hand you a recipe and say:

“Here’s dinner.”

We want to know:

Where did it come from?

Why did people begin making it?

What does it mean to the people who live there?

How is it traditionally served?

And what would it feel like to sit at a table in the place where that dish became part of the culture?

Because once we understand the story…

The food tastes a little different.

🍽️ Cuisine Is Culture You Can Taste

Think about Italy.

Italian cuisine isn’t simply “Italian food.”

Travel from Naples to Tuscany, Bologna, Sicily or the Italian Alps and the dishes change dramatically.

Why?

Because the geography changes.

The climate changes.

The ingredients change.

And the history changes.

The same thing happens throughout the world.

Mexican cuisine changes from Oaxaca to Puebla to the Yucatán.

French cooking changes from Burgundy to Provence, Normandy, and Alsace.

Greek island cooking isn’t identical to what you’ll encounter in northern Greece.

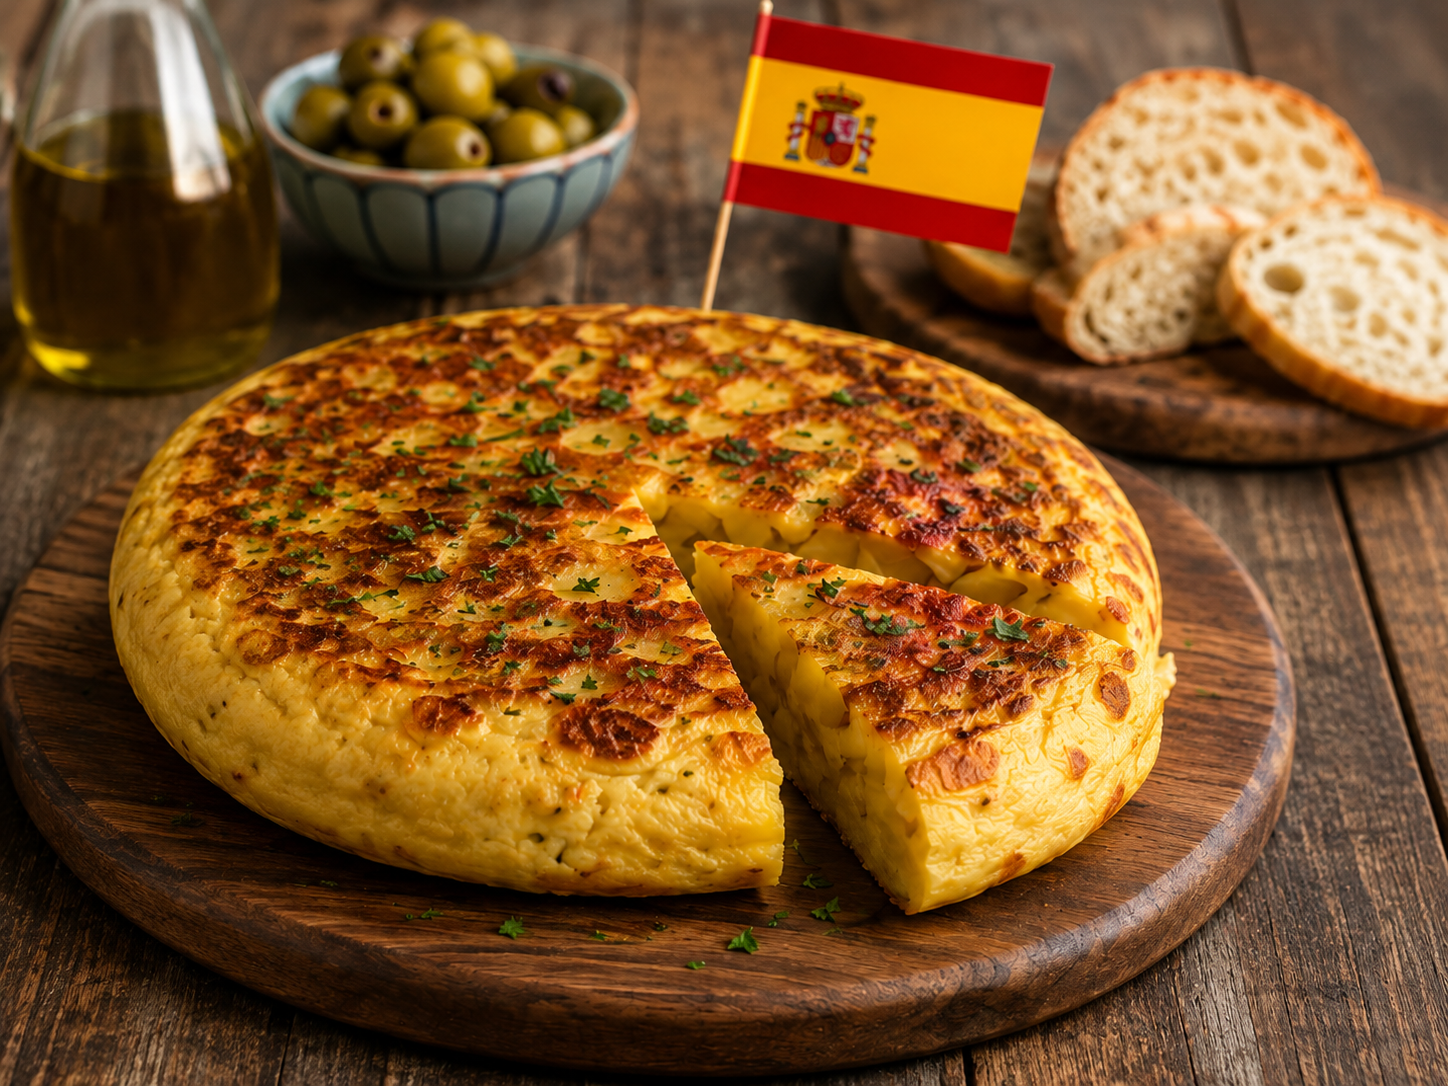
Spanish cuisine changes dramatically between Valencia, Catalonia, Madrid, Galicia, Andalusia, and the Basque Country.

That’s one of the discoveries we’ll continue making together.

Sometimes Global Kitchen will visit a new country.

And sometimes we’ll return to a country we’ve already explored and go deeper into a particular region, city, or culinary tradition.

Because you could spend a lifetime traveling the world through food…

And never run out of places to discover.

✈️ So What Does “Travel Without a Ticket” Really Mean?

It means you don’t have to wait until your next vacation to experience something new.

Maybe Italy isn’t in the budget this year.

Maybe the kids are in school.

Maybe work is busy.

Maybe you’re already planning another trip.

Or perhaps you’ve never considered traveling to a particular country at all.

That’s okay.

Tonight…

Your kitchen can take you there.

Put on some Italian music.

Open a bottle of Italian wine—or pour sparkling water for the kids.

Learn how to say buon appetito.

Make a traditional dish.

Talk about where it came from.

Look at photographs of the region.

Find it on a map.

Imagine sitting at a little table overlooking the Mediterranean.

For one evening, you’re doing more than making dinner.

You’re experiencing another culture together.

No airport.

No suitcase.

No passport required.

That’s Travel Without a Ticket.

👨‍👩‍👧‍👦 Make the World Part of Your Family Table

One of my favorite possibilities for Global Kitchen has very little to do with becoming a great cook.

It’s about creating curiosity.

Imagine allowing your children or grandchildren to choose next week’s destination. Using it as a teaching tool.

They find the country on a map.

Everyone learns a phrase.

You play music from that part of the world.

You prepare one of our recipes together.

Maybe everybody loves it.

Maybe somebody takes one bite and decides they definitely don’t.

That’s okay too.

Because they tried something new.

And perhaps years later, someone sitting around that table will say:

“Remember when we made that dish from Greece? I’d really like to go there someday.”

That’s how dreams begin.

Sometimes with an airplane ticket.

Sometimes with a photograph.

And sometimes…

With dinner.

🍷 Every Week, A New Destination

Each week, Travel-a-Go-Go Travel’s Global Kitchen will take you somewhere different.

We’ll explore the destination and its culture.

We’ll learn about its culinary history.

We’ll introduce you to three dishes and give you complete recipes so you can prepare them at home.

We’ll talk about presentation and serving traditions.

We’ll suggest beverage pairings.

We’ll add music to help create the atmosphere.

We’ll learn a word or phrase from the local language.

We’ll share a quicker version when life doesn’t give you two hours to make dinner.

And we’ll explore where you might experience those flavors close to home.

Most importantly…

We’ll tell you why the food belongs to that place.

Because Global Kitchen isn’t simply about learning how to cook something.

It’s about discovering where it came from.

🧭 You Don’t Have to Be a Chef

Neither do we expect you to be one.

Some weeks you’ll make the complete traditional recipe.

Some weeks you’ll try the five-minute version.

Some weeks you’ll decide you’re much happier letting a restaurant cook it for you.

Perfect.

The goal isn’t culinary perfection.

The goal is discovery.

Try something.

Taste something.

Learn something.

Talk about something.

And perhaps begin dreaming about somewhere you hadn’t thought about yesterday.

❤️ Food Has a Remarkable Way of Bringing Us Together

Around the world, the details may change.

The language changes.

The ingredients change.

The table looks different.

But something remarkably familiar keeps happening.

People gather around food.

Families celebrate with it.

Friends share it.

Grandparents teach recipes to grandchildren.

Communities preserve traditions through it.

Visitors are welcomed with it.

Food tells stories about where we’ve been and who we are.

And sometimes discovering another culture’s food reminds us that people thousands of miles apart may have far more in common than we imagined.

That’s another reason we’re taking this journey.

📖 And This Journey Is Just Beginning

Week by week, destination by destination and recipe by recipe, Global Kitchen will continue growing.

Italy.

Greece.

Mexico.

Spain.

France.

And then…

Another country.

Another region.

Another table.

Over time we’ll revisit destinations and explore them more deeply.

We’ll discover regional specialties.

We’ll celebrate seasonal and holiday traditions.

We’ll listen to your requests for dishes and destinations you’d like us to explore.

And we’ll continue building a collection of stories and recipes from around the world.

So bookmark the page.

Share it with someone who loves food or travel.

Come back every week.

And most importantly…

Pull up a chair.

There’s always room for one more person at the Global Kitchen table.

🌎 From Your Dining Table to the Real Thing

There is one final part of Travel Without a Ticket that I hope happens from time to time.

Maybe you’ve been following Global Kitchen for months.

Then one evening you prepare a dish from Provence.

You read about the villages.

You see the markets.

You hear the music.

You pour the wine.

And somewhere between the first bite and dessert, somebody at the table says:

“We should go there.”

That’s the moment I love.

Because sometimes food doesn’t simply help us remember a destination.

Sometimes it introduces us to our next one.

Until that day, we’ll keep bringing the world to your dining table.

We’ll explore it.

We’ll cook it.

We’ll learn about it.

We’ll dream about it.

We’ll Travel Without a Ticket.

And when the day comes that you’re ready to stop imagining what it would be like…

When you’re ready to walk those streets…

Visit those markets…

Meet those people…

Sit at that table…

And taste that dish where it all began…

Travel-a-Go-Go Travel will be ready to turn that dream trip into a reality.

Until then…

Keep exploring.

Keep cooking.

Keep dreaming.

I’ll meet you at the next gate.

Gregg Dungan
Owner & Travel Advisor

Travel-a-Go-Go Travel

Dream Trips. Done Deals. Relax…We’ve Got This!

Travel-a-Go-Go Travel’s Global Kitchen

Bringing the World We’ve Traveled…to Your Dining Table.

admin
Author: admin

Explore Morocco Essence

There are destinations you see.

And then there are destinations you seem to experience with every one of your senses.

Morocco is one of those places.

Walk through a souk and the colors immediately surround you—handwoven rugs, painted ceramics, pyramids of spices, dates, olives, and baskets overflowing with produce.

Then come the aromas.

Cumin.

Cinnamon.

Ginger.

Saffron.

Fresh mint.

Grilled meats.

Slow-cooked tagines.

Bread emerging from an oven.

And somewhere nearby, someone is pouring steaming Moroccan mint tea from a silver pot held impressively high above a tiny glass.

Morocco sits at a remarkable geographic and cultural crossroads. Amazigh (Berber), Arab, African, Andalusian, Mediterranean and other historical influences have all helped shape its food traditions.

And Moroccan cooking understands something particularly well:

Flavor doesn’t have to mean heat.

Spices are layered to create aroma, warmth, and complexity rather than simply making food hot.

Sweet meets savory.

Fruit appears beside meat.

Preserved lemon brightens slow-cooked chicken.

Cinnamon and cumin can share the same dish.

Almonds, honey, and orange blossom transform pastry into something extraordinary.

And meals are intertwined with another essential part of Moroccan culture:

Hospitality.

Food isn’t simply nourishment.

It’s welcome.

It’s conversation.

It’s community.

It’s an invitation to stay a little longer.

This week, Global Kitchen is experiencing Morocco through three dishes:

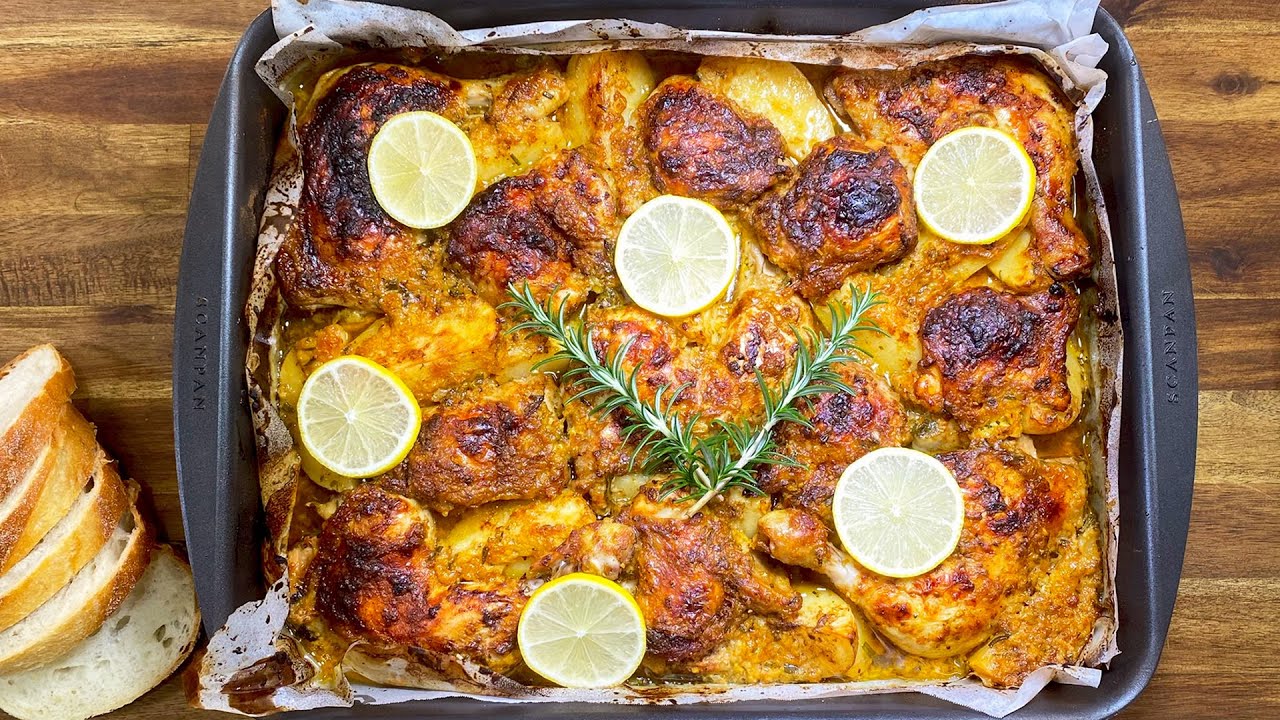
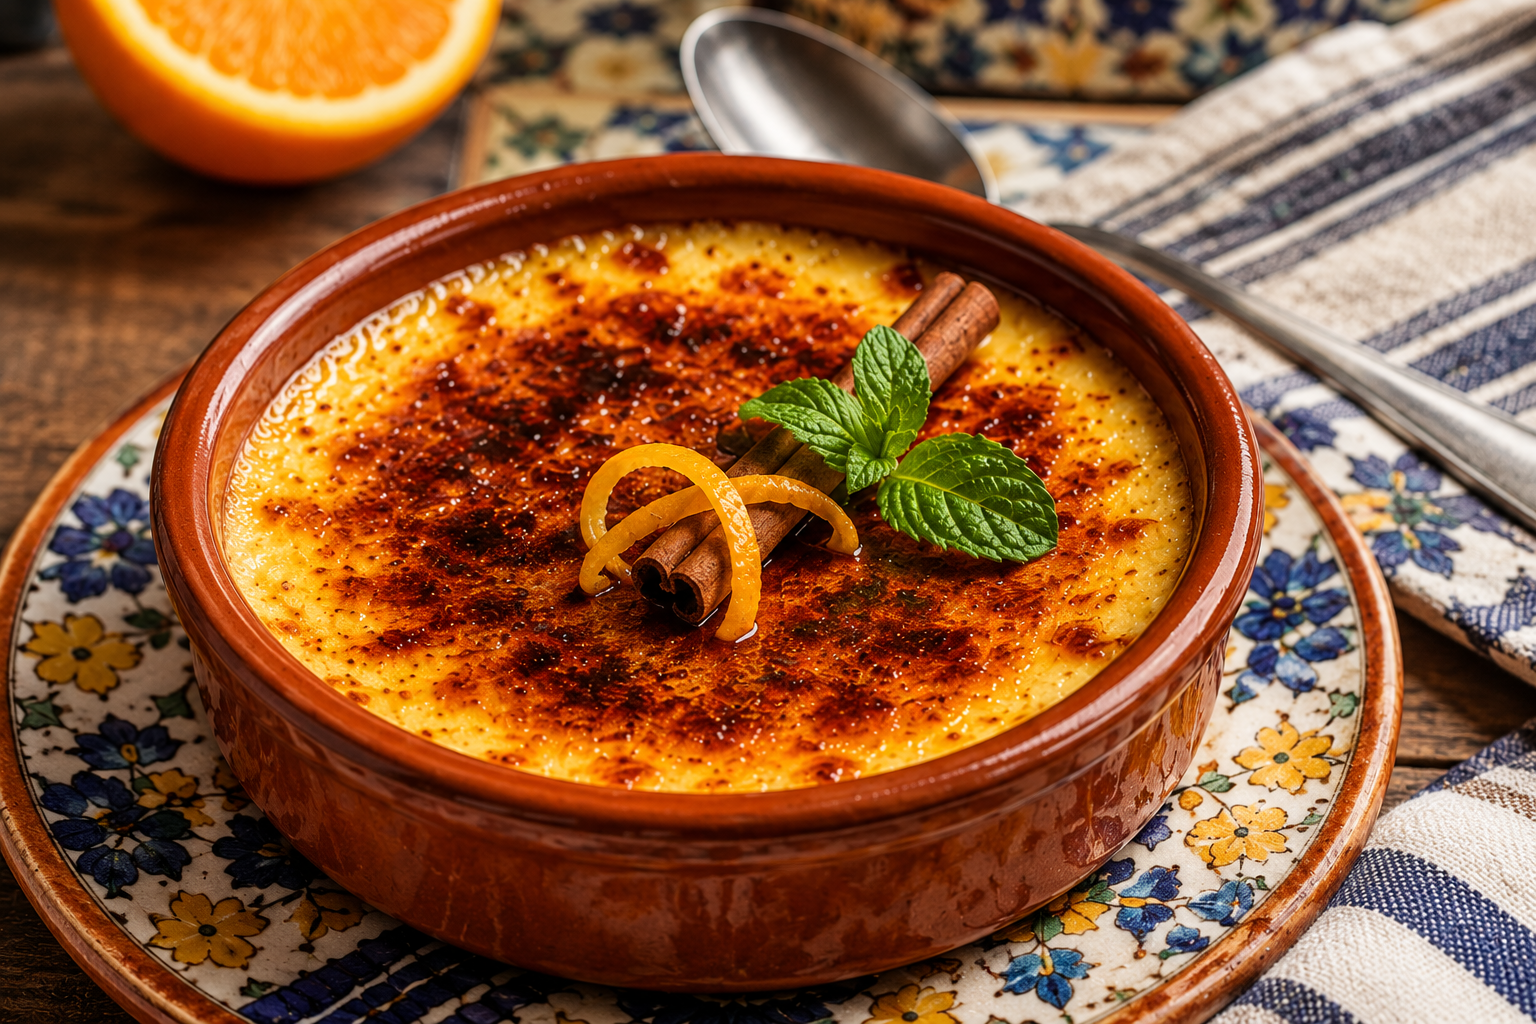
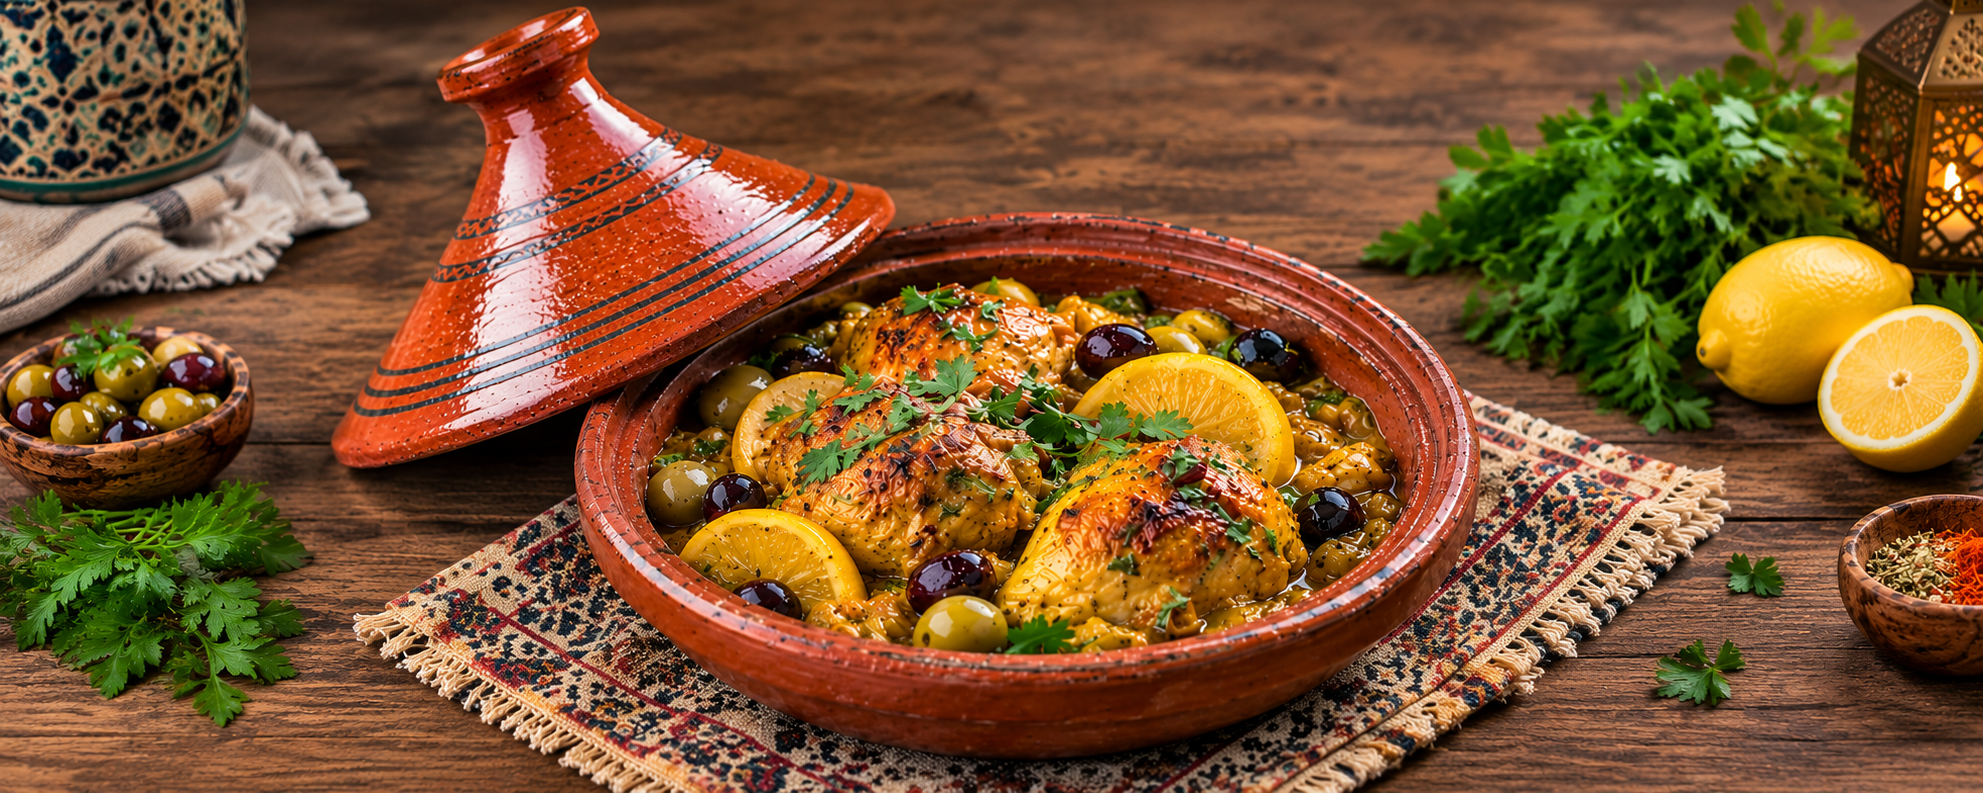
🍋 Moroccan Chicken Tagine with Preserved Lemon & Olives

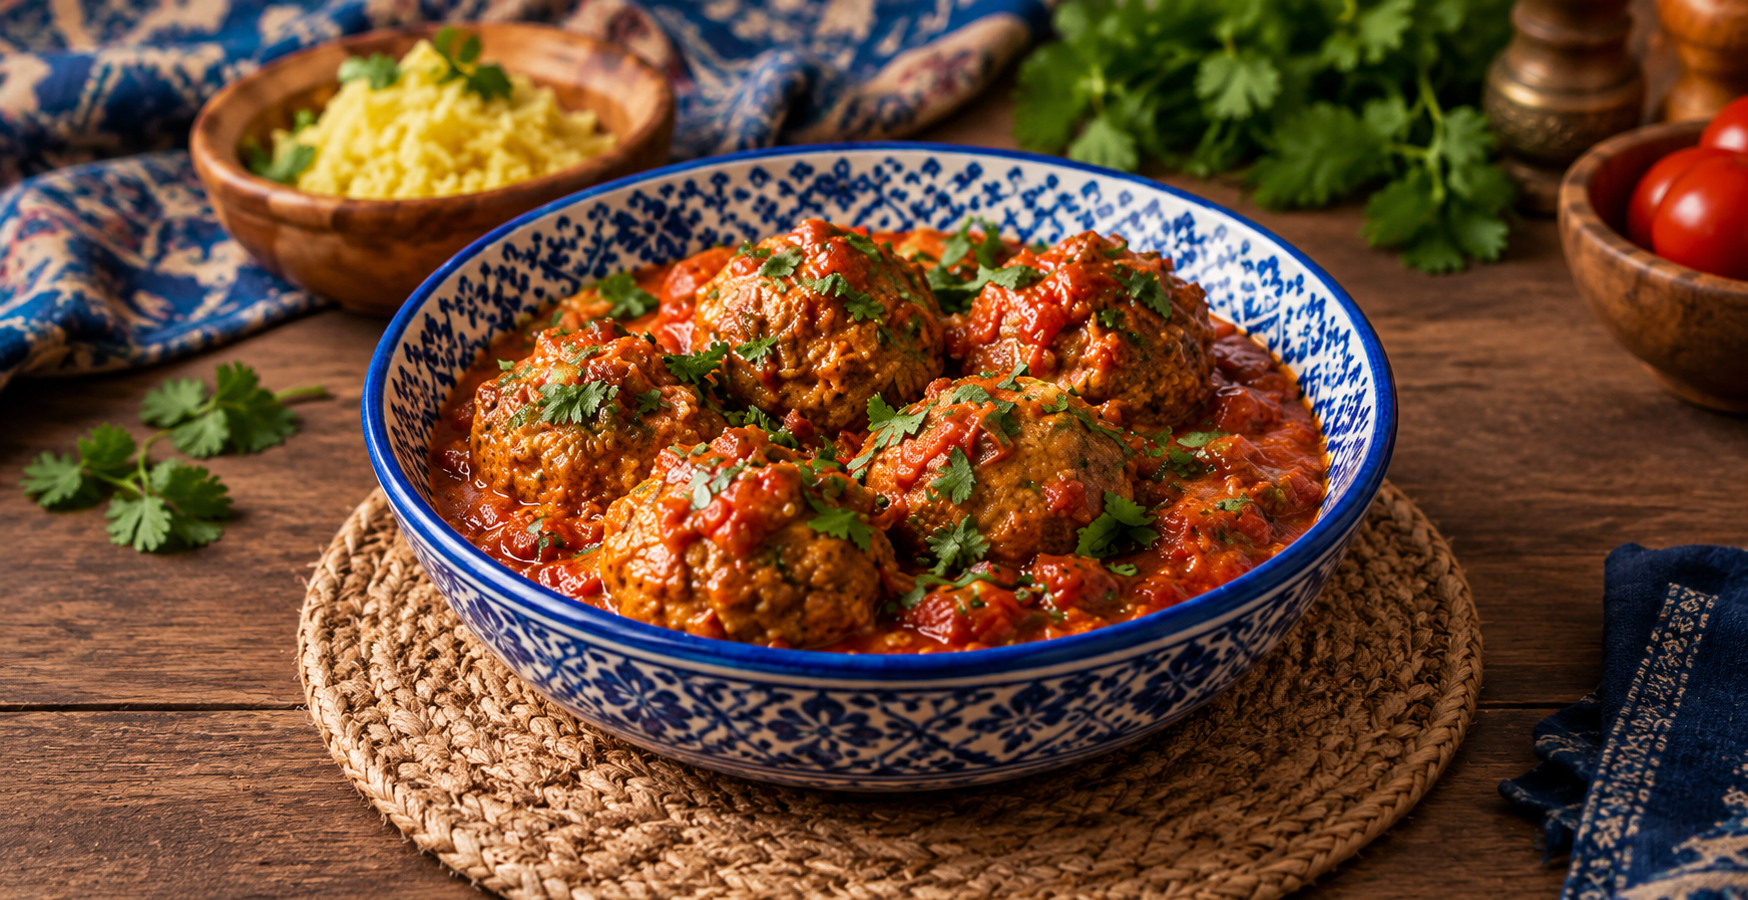
🍅 Kefta Mkaouara — Moroccan Meatballs in Spiced Tomato Sauce

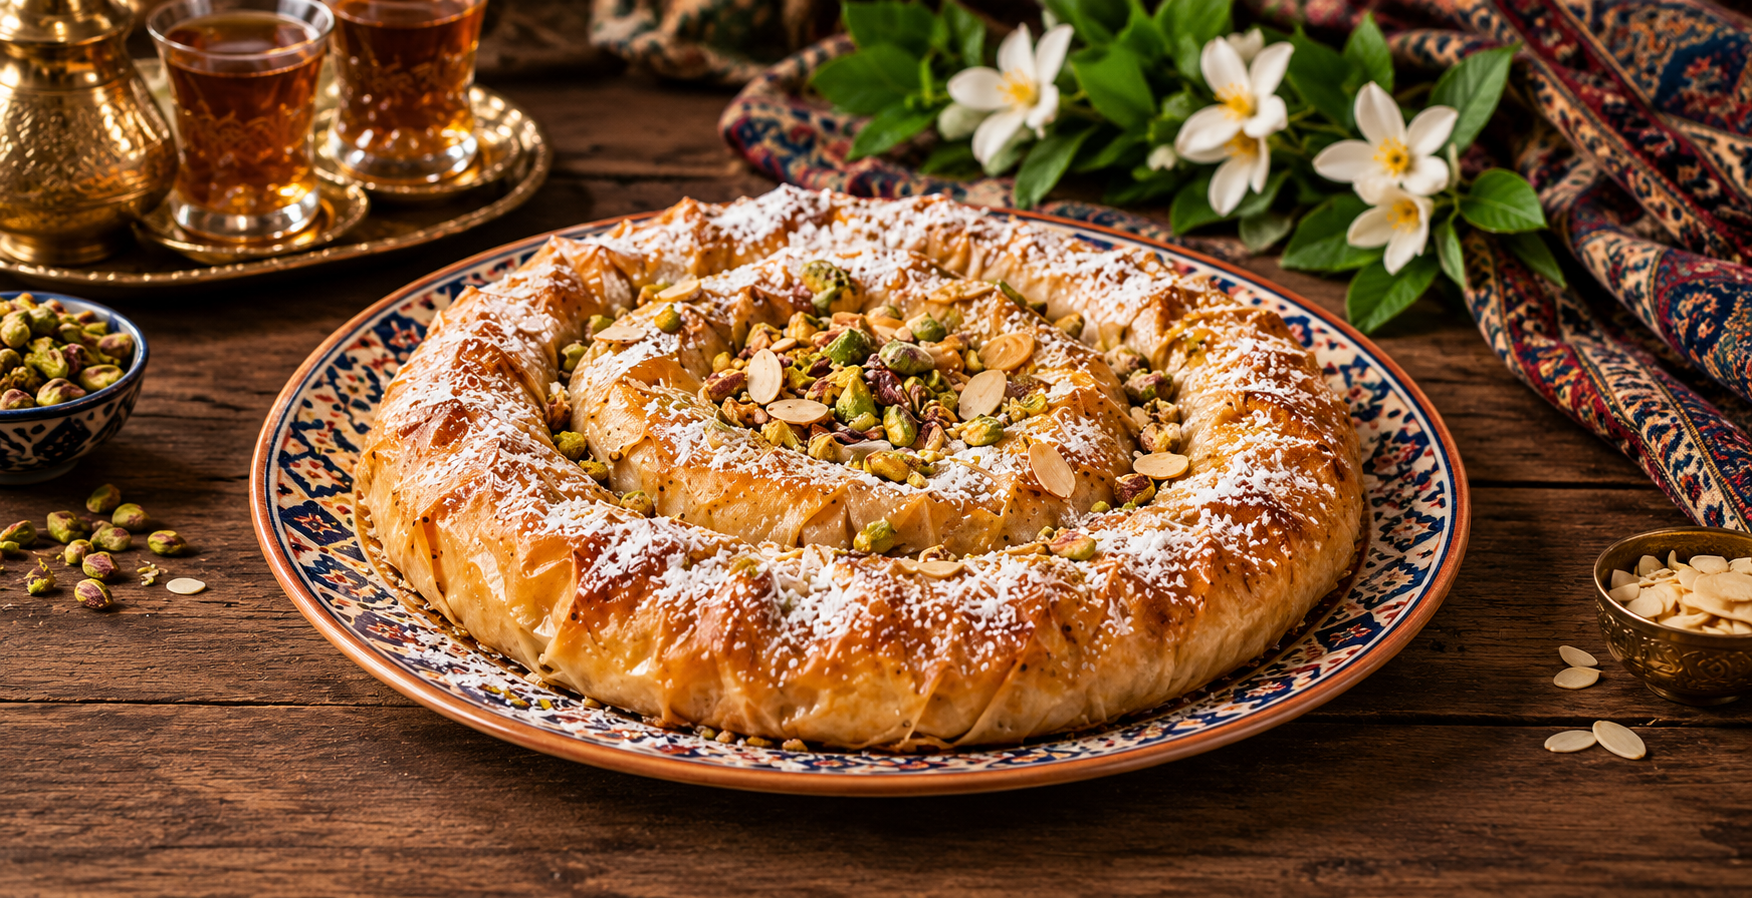
🌰 M’hanncha — Moroccan Almond “Snake” Pastry

One fragrant slow-cooked classic.

One family-style comfort dish.

And one spectacular dessert.

Tonight, we’re headed to Morocco.

No passport required.

🇲🇦 This Week’s Phrase

Bssaha!

A common Moroccan expression associated with enjoying something in good health.

For our table tonight, think:

Enjoy—and may it bring you good health!

🎵 Music While You Cook

Set the atmosphere with:

Traditional Moroccan music

Gnawa

Andalusian Moroccan music

Amazigh music

Contemporary Moroccan or Maghrebi café music

Tiramisu

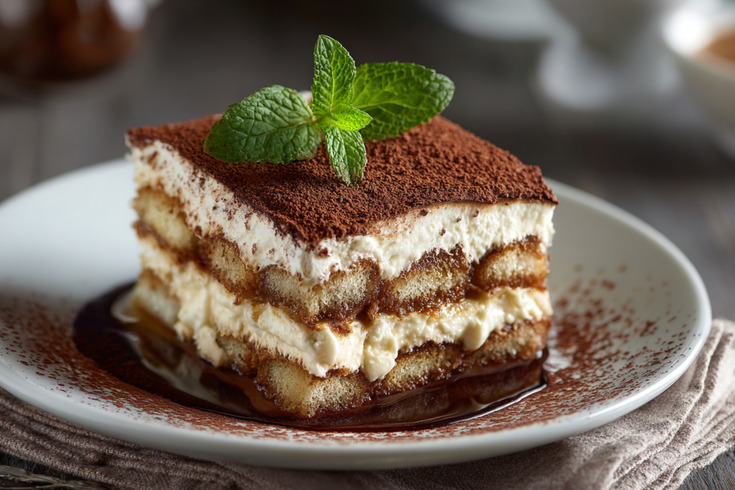
Travel-a-Go-Go Travel’s Global Kitchen Venice, Italy Layers of Love Classic Italian Tiramisu Bringing the World We’ve Traveled…to Your Dining Table. The Story Behind the Dish Few desserts are as recognizable—or as loved—as Tiramisu. Its name literally means “pick me up” in Italian, a fitting tribute to the rich espresso, creamy mascarpone, and delicate cocoa that make every bite unforgettable. Although several regions of Italy claim to be the birthplace of Tiramisu, most culinary historians trace its modern origins to the Veneto region during the 1960s, particularly around the beautiful city of Treviso, just north of Venice. Originally served in family-run restaurants and neighborhood cafés, Tiramisu quickly became one of Italy’s most beloved desserts. Unlike elaborate pastries, its beauty lies in its simplicity. Layers of coffee-soaked ladyfingers, velvety mascarpone cream, and a dusting of cocoa powder come together to create a dessert that is both elegant and comforting. Today, you’ll find Tiramisu served in cafés from Venice to Rome and in restaurants around the world—but there’s something special about enjoying it where it all began. This week, we’re bringing that timeless Italian tradition into your own kitchen. Why This Dish Matters Italian desserts rarely rely on excessive sweetness. Instead, they focus on balance. Tiramisu combines the bold flavor of espresso, the richness of mascarpone, the lightness of whipped cream, and the subtle bitterness of cocoa powder into one perfectly balanced dessert. Best of all… There’s no baking required. Recipe at a Glance: Preparation Time: 30 minutes Cooking Time: None Chilling Time: Minimum 4 hours (overnight preferred) Total Time: Approximately 4½ hours Difficulty: Easy Servings: 8–10 Ingredients Cream Layer 16 ounces mascarpone cheese, softened 1½ cups heavy whipping cream ½ cup granulated sugar 1 teaspoon pure vanilla extract Coffee Layer 1½ cups strong brewed espresso or dark coffee, cooled completely 2 tablespoons coffee liqueur (optional) 24–30 ladyfinger cookies (Savoiardi) 3 tablespoons unsweetened cocoa powder 1-ounce dark chocolate, finely shaved (optional) Preparation Step 1 – Brew the Coffee Prepare a strong pot of espresso or dark coffee. Allow it to cool completely. If using coffee liqueur, stir it into the cooled coffee. Set aside. Step 2 – Prepare the Cream In a large mixing bowl, whip the heavy cream, sugar, and vanilla until soft peaks form. In a separate bowl, gently stir the mascarpone until smooth. Carefully fold the whipped cream into the mascarpone until fully combined. Avoid overmixing. The mixture should remain light and airy. Step 3 – Dip the Ladyfingers Working one at a time, quickly dip each ladyfinger into the cooled coffee. Do not soak them. One second per side is enough. The cookies should absorb flavor without becoming soggy. Step 4 – Build the First Layer Arrange the dipped ladyfingers in a single layer inside a 9 x 13-inch baking dish. Spread half of the mascarpone mixture evenly across the cookies. Use an offset spatula or the back of a spoon for a smooth finish. Step 5 – Repeat Create a second layer of coffee-dipped ladyfingers. Top with the remaining mascarpone cream. Smooth the surface evenly. Cover tightly. Refrigerate for at least four hours. For the best flavor and texture, chill overnight. Step 6 – Finish Just before serving, dust generously with unsweetened cocoa powder. Add dark chocolate shavings if desired. Serve chilled. Chef’s Notes Never rush the chilling process. Tiramisu becomes better overnight as the flavors have time to blend. Patience truly rewards you. Garnishing & Presentation Serve in chilled dessert plates. Finish with: Cocoa powder Chocolate curls Fresh raspberries (optional) Mint sprig (optional) A cappuccino served alongside makes a beautiful presentation. Suggested Pairings Wine Vin Santo Moscato d’Asti Family-Friendly Espresso Cappuccino Italian hot chocolate Sparkling water with lemon 5-Minute Travel Version Need dessert in a hurry? Layer vanilla wafers or shortbread cookies with instant vanilla pudding mixed with whipped topping. Lightly brush the cookies with cooled coffee. Dust with cocoa powder. Chill for 30 minutes. While not traditional, it captures many of the beloved flavors of classic Tiramisu. Gregg’s Passport Notes  Venice teaches you to slow down. There are no highways cutting through the city. No constant rush of traffic. Instead, people walk. They linger in cafés. They enjoy conversations over espresso. They watch gondolas drift quietly along centuries-old canals. One of the greatest travel lessons Venice offers is that life doesn’t always need to move faster. Sometimes it simply needs to be savored. Tiramisu reminds me of that. Every layer asks you to slow down and enjoy the moment. Where to Experience This Dish Treviso & Venice, Italy Treviso is often considered the birthplace of modern Tiramisu, while nearby Venice offers countless cafés where this classic dessert is served after unforgettable meals beside the city’s famous canals. If you’re craving authentic Italian desserts closer to home, look for locally owned Italian restaurants and bakeries throughout the Waco, Temple, and Killeen area. Many feature house-made tiramisu and other traditional desserts crafted from family recipes. As our Global Kitchen community grows, we’ll continue highlighting exceptional local favorites.  Central Texas Picks: Can’t make it to Italy just yet? Here are a few wonderful places in Central Texas where you can enjoy a delicious Tiramisu while dreaming about your future trip to Venice: Pignetti’s Waco– Waco • Di Campli’s Italian Ristorante – Woodway • Portofino’s Authentic Italian Restaurant – Downtown Waco • Pignetti’s – Temple • Little Italy Italian Family Restaurant – Killeen Supporting local restaurants is another great way to experience the flavors of the world right here at home.    Turn This Recipe into Your Next Vacation Imagine ending an evening in Venice. The sun has slipped below the rooftops. A gondola quietly glides beneath a centuries-old bridge. Church bells echo across the Grand Canal. Your dinner has ended, and your server places before you a perfectly chilled slice of homemade Tiramisu. You take one bite. Rich espresso. Silky mascarpone. Delicate cocoa. For a moment… Life slows down. And you realize that some of the world’s greatest memories aren’t found in museums or guidebooks. They’re found around a table. When you’re ready to experience Venice for yourself… To wander across the Rialto Bridge… Explore St.
Read More »

Risotto alla Milanese

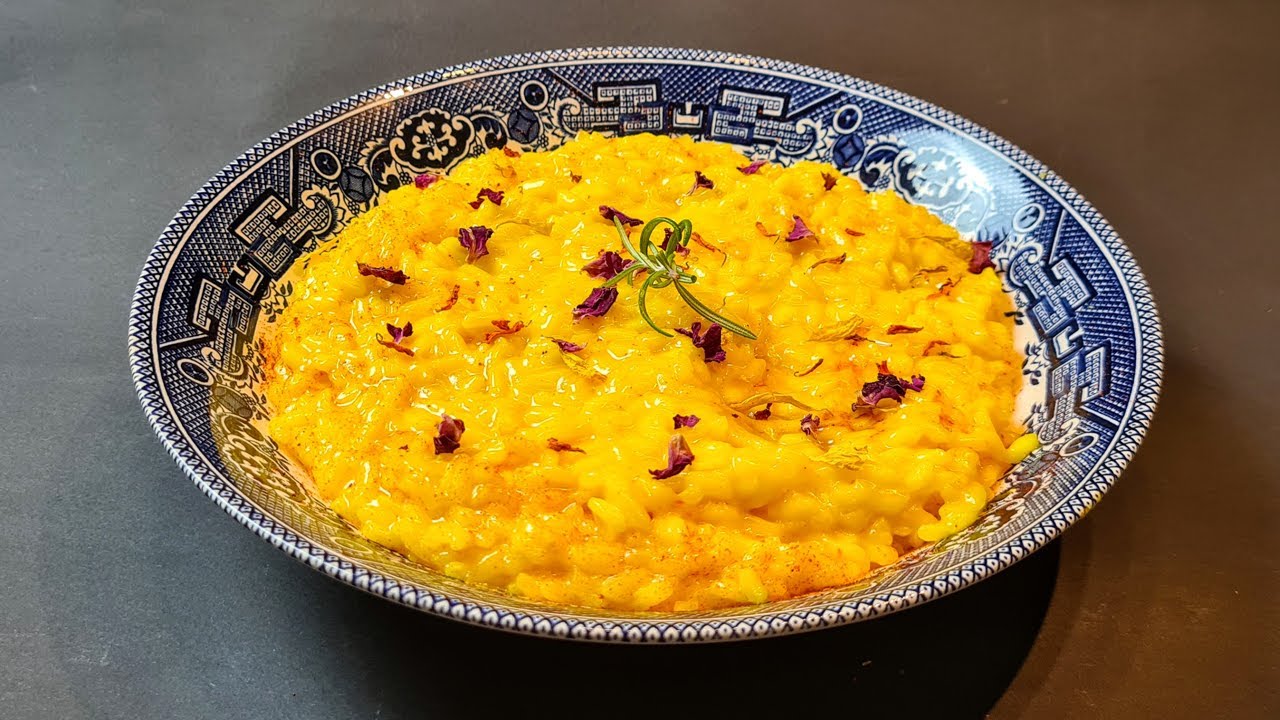
Bringing the World We’ve Traveled…to Your Dining Table. The Story Behind the Dish Few dishes capture the elegance of Northern Italy quite like Risotto alla Milanese. Unlike the tomato-rich dishes of southern Italy or the seafood specialties found along the Mediterranean coast, Milan is known for refined cuisine built around butter, cheeses, Arborio rice, and one of the world’s most treasured spices—saffron. Legend has it that in the late 1500s, an apprentice working on the stained-glass windows of Milan’s magnificent Duomo Cathedral was known for adding saffron to create brilliant golden colors. During a wedding celebration, friends jokingly stirred saffron into a pot of rice. The result wasn’t a prank—it was a masterpiece. The rice turned a stunning golden yellow, and Risotto alla Milanese was born. Whether the legend is completely true or not, one thing is certain: for centuries, this dish has symbolized warmth, comfort, and celebration throughout northern Italy. Today, it remains one of Milan’s signature recipes and is often served alongside the famous Osso Buco, making it one of Italy’s most iconic culinary pairings. This week, we’re bringing that rich tradition into your own kitchen. Why This Dish Matters Risotto is often misunderstood. Many people think it’s simply rice cooked in broth. Risotto is a technique—a slow, patient process of adding warm broth one ladle at a time, allowing the rice to gradually release its natural starches. The result is a creamy texture without using heavy cream. It’s one of Italy’s greatest examples of turning humble ingredients into something extraordinary. Recipe at a Glance Preparation Time: 10 minutes Cooking Time: 30 minutes Total Time: 40 minutes Difficulty: Moderate Servings: 4 Ingredients For the Risotto 1½ cups Arborio rice 4–5 cups chicken broth (or vegetable broth for a vegetarian version), kept warm 1 small yellow onion, finely diced 3 tablespoons unsalted butter, divided 1 tablespoon extra-virgin olive oil ½ cup dry white wine (optional but traditional) ½ teaspoon saffron threads 2 tablespoons warm broth (for blooming the saffron) ¾ cup freshly grated Parmigiano-Reggiano cheese ½ teaspoon kosher salt (adjust to taste) ¼ teaspoon freshly cracked black pepper Fresh parsley, finely chopped (optional garnish) Preparation Step 1 – Warm the Broth Place the broth into a saucepan over low heat. Do not boil it. Keeping the broth warm is essential because adding cold broth slows the cooking process and prevents the rice from cooking evenly. Step 2 – Bloom the Saffron Place the saffron threads into a small bowl. Pour two tablespoons of warm broth over them. Allow them to soak for 10 minutes. This unlocks the spice’s beautiful golden color and distinctive floral aroma. Step 3 – Cook the Aromatics In a large sauté pan or Dutch oven, melt: 1 tablespoon butter Olive oil Add the diced onion. Cook for about 4 minutes over medium heat until soft and translucent. Do not brown the onions. Italian cooking values sweetness and subtlety here. Step 4 – Toast the Rice Add the Arborio rice. Stir continuously for about 2 minutes. Every grain should become lightly coated with butter and oil. The edges of the rice will begin looking slightly translucent while the centers remain white. This step develops flavor and helps the rice maintain its texture. Step 5 – Deglaze Pour in the white wine. Stir until nearly all of the liquid has evaporated. This adds brightness and balances the richness of the butter and cheese. Step 6 – Build the Risotto Add one ladle of warm broth. Stir gently but continuously. Wait until nearly all the liquid has been absorbed before adding another ladle. Continue this process for about 20 minutes. Do not rush. Risotto rewards patience. Step 7 – Add the Saffron About halfway through cooking, stir in the saffron and its soaking liquid. Almost instantly, the rice transforms into its famous golden color. Continue adding broth until the rice is creamy but still slightly firm in the center. Italian chefs call this al dente. Step 8 – Finish the Dish Remove the pan from the heat. Add: Remaining butter Parmigiano-Reggiano Fold gently until completely melted. Taste. Adjust with salt and pepper if needed. Allow the risotto to rest for two minutes before serving. Chef’s Notes Perfect risotto should slowly spread across the plate. If it stands like mashed potatoes… it’s too thick. If it runs like soup… it’s too thin. The perfect risotto gently flows. Garnishing & Presentation Serve immediately on warmed shallow bowls. Finish with: Fresh Parmesan Tiny sprinkle of parsley Few saffron threads (optional) Fresh cracked pepper Never let risotto sit too long. It is at its absolute best the moment it’s finished. Suggested Pairings Wine Pinot Grigio Chardonnay Gavi di Gavi Family-Friendly Sparkling lemonade Italian blood orange soda Sparkling mineral water with lemon 5-Minute Travel Version Short on time? Use: Microwave-ready Arborio or white rice Warm chicken broth Pinch of saffron Butter Fresh Parmesan Heat everything together in a skillet for about five minutes. While it isn’t traditional, it still captures the beautiful flavors of Milan. Gregg’s Passport Notes  Milan often surprises travelers. Many arrive expecting only fashion boutiques and luxury shopping. Instead, they discover elegant cafés, incredible museums, magnificent churches, and one of Italy’s most sophisticated dining scenes. If you’re visiting Milan, don’t rush through dinner. Order a risotto. Slow down. Watch people stroll through the piazzas. Sip a glass of wine. One of the greatest lessons Italy teaches us is that meals aren’t interruptions to life… They are life. Where to Experience This Dish  Milan, Italy One of the finest places to enjoy authentic Risotto alla Milanese is in the historic Brera district, where traditional trattorias have perfected this classic recipe for generations. Pair it with a visit to the Duomo di Milano and you’ll experience both the culinary and cultural heart of the city. If you’d like to enjoy Northern Italian-inspired cuisine closer to home, explore these locally owned Italian restaurants in the Waco, Temple, and Killeen area that specialize in handmade pastas and classic risotto dishes. As our Global Kitchen community grows, we’ll continue highlighting outstanding local restaurants that
Read More »

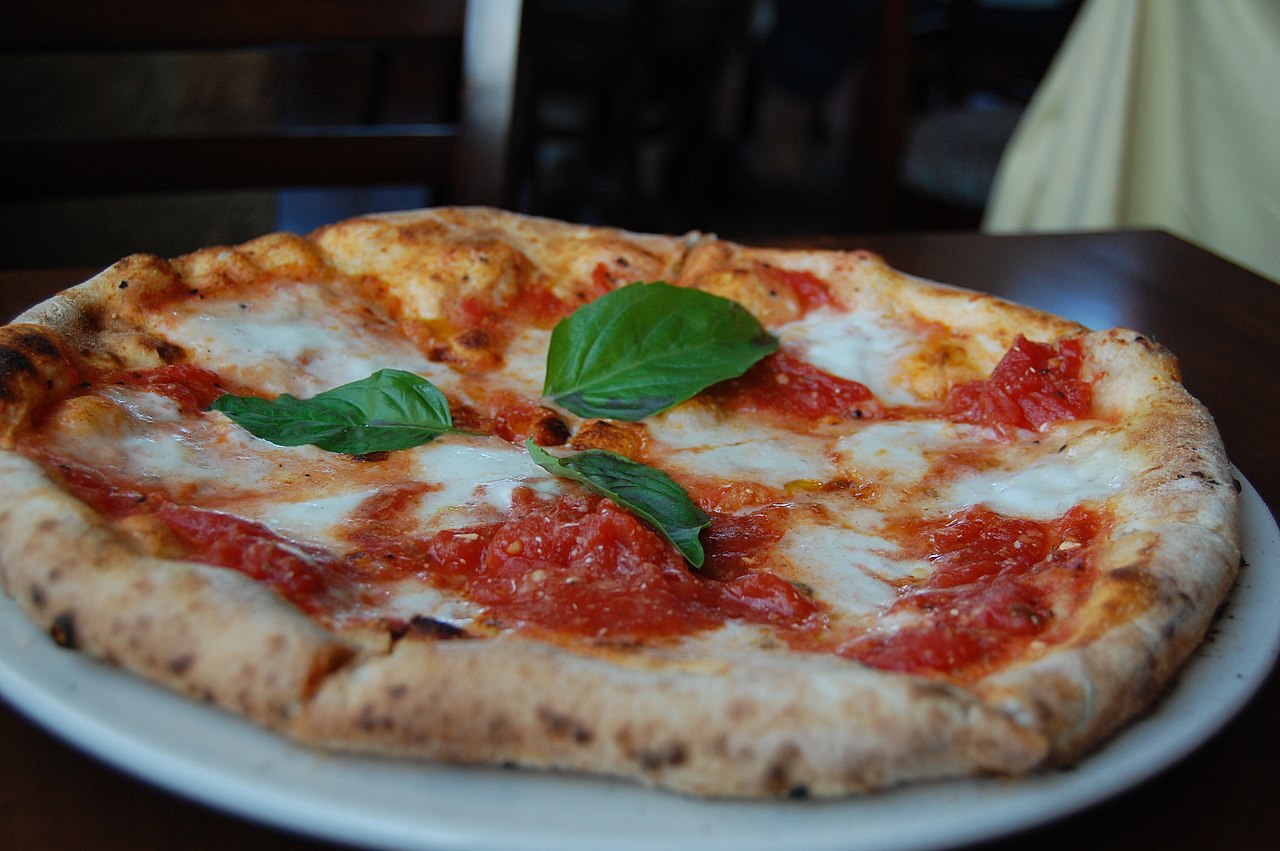
Authentic Neapolitan Margherita Pizza

“The Pizza That Became a National Treasure” The Story Behind the Recipe Legend tells us that in 1889, Queen Margherita of Savoy visited Naples. Wanting to honor Italy’s newly unified nation, a local pizzaiolo created a pizza featuring tomatoes, mozzarella, and fresh basil—the colors of the Italian flag. Whether the story is legend or fact, one thing is certain… Naples remains the birthplace of pizza, and locals still consider simplicity the secret ingredient. This recipe stays true to that tradition. Recipe Information Preparation Time: 25 minutes (plus 1½ hours rising time) Cooking Time: 10–12 minutes Total Time: About 2 hours Difficulty: Moderate Servings: 4 Ingredients Dough 3 cups bread flour 2¼ teaspoons active dry yeast (1 packet) 1 teaspoon sugar 1 teaspoon kosher salt 1 cup warm water (105°–110°F) 2 tablespoons extra virgin olive oil Sauce ½ cup crushed San Marzano tomatoes ½ teaspoon sea salt 1 tablespoon olive oil Toppings 8 ounces fresh mozzarella, sliced 12 fresh basil leaves Extra virgin olive oil for drizzling Fresh cracked black pepper (optional) Freshly grated Parmigiano-Reggiano (optional) Step-by-Step Instructions Prepare the Dough In a small bowl, combine the warm water, sugar, and yeast. Allow the mixture to rest for 5–10 minutes until it becomes foamy. In a large mixing bowl, whisk together the flour and salt. Pour in the yeast mixture and olive oil. Stir until the dough begins to come together. Transfer to a lightly floured surface and knead for 8–10 minutes until smooth and elastic. Lightly oil a clean bowl, place the dough inside, cover with a towel, and allow it to rise for 60–90 minutes or until doubled in size. Prepare the Sauce Mix together: Tomatoes Olive oil Salt That’s it. Authentic Italian pizza sauce is intentionally simple. Build the Pizza Preheat your oven to 500°F. If you have a pizza stone, place it in the oven while it preheats. Stretch the dough into a 12–14-inch circle. Spread a thin layer of tomato sauce across the dough. Arrange slices of fresh mozzarella evenly over the top. Bake for 10–12 minutes until the crust becomes golden brown and the cheese begins to bubble. Immediately after removing from the oven: Scatter fresh basil leaves across the pizza. Drizzle lightly with olive oil. Finish with fresh cracked pepper if desired. Chef Gregg’s Travel Tip Don’t overload the pizza. Authentic Neapolitan pizza uses surprisingly little topping. The crust, tomatoes, and mozzarella should all shine equally. Garnishing & Presentation Serve on a wooden pizza board. Add: Fresh basil Olive oil drizzle Flaky sea salt Fresh Parmesan Cut into six slices. Serve immediately. Suggested Pairings Adults Chianti Pinot Grigio Peroni Family Friendly Sparkling lemonade Italian soda Sparkling water with lemon Best Place to Experience It Naples, Italy Few experiences compare to enjoying a wood-fired pizza from one of Naples’ historic pizzerias while overlooking the Bay of Naples. If you’re craving authentic Italian pizza closer to home, consider exploring well-regarded Italian restaurants in the Waco–Temple–Killeen area. Central Texas Picks:   Giovanni’s Italian Restaurant & Pizzeria – Copperas Cove MOROSO Italian Ristorante – Waco Little Italy Italian Family Restaurant – Killeen Pignetti’s – Waco & Temple Di Campli’s Italian Ristorante – Woodway Italiano’s Pizza, Pasta, & Subs – Temple 5-Minute Travel Version Short on time? Use a fresh naan bread or pre-made pizza crust. Top with: Marinara Fresh mozzarella Basil Bake for 8–10 minutes. Finish with olive oil. Dinner is ready. Dream Bigger… Imagine standing on a narrow cobblestone street in Naples as the aroma of wood-fired pizza fills the air. The oven crackles, the pizza is handed to you moments after leaving the fire, and beyond the rooftops you catch a glimpse of the Bay of Naples. That’s a memory no recipe can fully recreate. When you’re ready to turn today’s recipe into tomorrow’s passport stamp, Travel-a-Go-Go Travel would be honored to help you plan your Italian adventure. Dream Trips. Done Deals. Relax…We’ve Got This!

Read More »

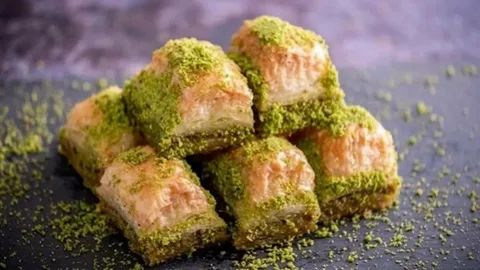
Baklava

The Story Behind the Dish Baklava is one of the most celebrated desserts of Greece and the eastern Mediterranean. Delicate sheets of phyllo dough are brushed with butter, layered with nuts and spices, baked until crisp, and soaked with a fragrant honey syrup. The dessert reflects centuries of cultural exchange. Versions are found throughout Greece, Turkey, the Balkans, the Middle East, and surrounding regions. Each tradition brings its own preferred nuts, spices, shapes, and syrup. Greek Baklava often features walnuts, cinnamon, honey, and lemon. It is served during holidays, weddings, celebrations, and family gatherings—but it is equally welcome beside a cup of strong coffee on an ordinary afternoon. Why This Dish Matters Baklava teaches patience and generosity. The thin sheets of phyllo require a gentle hand, but perfection is not required. Small tears disappear within the layers. Once baked, the pastry is finished with syrup and given time to absorb it. The result is crisp, sticky, nutty, fragrant, and deeply satisfying. A small piece is often all that is needed. Recipe at a Glance Preparation Time: 35 minutes Cooking Time: 40–45 minutes Cooling Time: Minimum 2 hours Total Time: Approximately 3 hours Difficulty: Moderate Yield: Approximately 24 pieces Ingredients For the Pastry 1 package phyllo dough, approximately 16 ounces, thawed 2 cups walnuts, pistachios, almonds, or a mixture 1 teaspoon ground cinnamon ¼ teaspoon ground cloves, optional 1 cup unsalted butter, melted For the Honey Syrup 1 cup honey ¾ cup granulated sugar ¾ cup water 1 tablespoon fresh lemon juice 1 cinnamon stick 1 strip lemon peel, optional 1 teaspoon vanilla extract, optional Preparation Step 1 – Thaw the Phyllo Correctly Thaw the phyllo dough in the refrigerator according to package directions. Bring it to room temperature before opening. Keep unused sheets covered with plastic wrap and a slightly damp kitchen towel while assembling the dessert. Phyllo dries quickly when exposed to air. Step 2 – Prepare the Nut Filling Place the nuts in a food processor. Pulse until finely chopped but not powdered. Transfer to a bowl and stir in the cinnamon and optional cloves. Set aside. Step 3 – Prepare the Baking Dish Preheat the oven to 350°F. Brush a 9 x 13-inch baking dish with melted butter. Trim the phyllo sheets if necessary so they fit the dish. Step 4 – Build the Bottom Layer Place one phyllo sheet in the dish. Brush lightly with melted butter. Repeat until 8 sheets have been layered. The butter does not need to cover every inch. A light brushing is enough. Step 5 – Add the Filling Sprinkle a thin, even layer of the nut mixture across the phyllo. Add 4 more sheets of phyllo, brushing each with butter. Add another layer of nuts. Continue alternating phyllo and nuts until the filling is used. Finish with 6–8 buttered phyllo sheets on top. Step 6 – Cut Before Baking Using a sharp knife, carefully cut the unbaked Baklava into diamonds, triangles, or squares. Cut all the way through to the bottom. Cutting before baking prevents the crisp pastry from shattering later. Step 7 – Bake Bake for 40–45 minutes. The top should be deeply golden, crisp, and fragrant. Step 8 – Prepare the Syrup While the Baklava bakes, combine: Honey Sugar Water Lemon juice Cinnamon stick Lemon peel Bring to a gentle boil. Reduce heat and simmer for 8–10 minutes. Remove from heat. Discard the cinnamon stick and lemon peel. Stir in vanilla if using. Step 9 – Add the Syrup Slowly pour the warm syrup over the hot Baklava as soon as it leaves the oven. You should hear the pastry gently sizzle. Allow it to cool uncovered for at least 2 hours. This gives the pastry time to absorb the syrup while preserving its crisp layers. Chef’s Notes Do not pour hot syrup over cold Baklava or cold syrup over cold pastry. For the best texture, one should be hot and the other warm or cool. Also, do not refrigerate freshly prepared Baklava unless necessary. Refrigeration can soften the phyllo. Store covered at room temperature for several days. Garnishing & Presentation Arrange pieces on a serving tray. Finish with: Finely chopped pistachios Small drizzle of honey Light dusting of cinnamon Edible rose petals, optional Serve in small portions with coffee or tea. Suggested Pairings Adults Greek dessert wine Brandy Sweet Muscat Family-Friendly Greek coffee Mint tea Black tea with lemon Sparkling water 5-Minute Travel Version Use prepared mini phyllo cups. Fill them with: Chopped walnuts or pistachios Cinnamon Small amount of melted butter Bake until warm and crisp. Drizzle with honey and finish with crushed pistachios. Gregg’s Passport Notes  Thessaloniki is a city made for travelers who enjoy discovering destinations through food. Its markets, bakeries, cafés, waterfront restaurants, and pastry shops reflect generations of Greek, Balkan, Mediterranean, Jewish, and Ottoman influence. Give yourself permission to taste unfamiliar things. Order a pastry you cannot pronounce. Ask the server what the family recommends. Travel becomes far more meaningful when curiosity leads the way. Where to Experience This Dish Thessaloniki and Athens, Greece Both cities are known for pastry shops filled with honey-soaked desserts, layered phyllo creations, cookies, cakes, and regional specialties. Thessaloniki is especially celebrated for its rich baking and café traditions. Central Texas Picks Mediterranean restaurants, Greek cafés, international bakeries, and specialty markets in the Waco–Temple–Killeen region may offer Baklava by the piece or by the tray. Because menus change, verify availability before visiting. Gyro Stop – Killeen Kebabistan Grill – Killeen Café Baklava – Killeen Alpha Omega Grill & Bakery – Waco (2 locations) D’s Mediterranean Grill – Waco  Turn This Recipe Into Your Next Vacation Imagine stepping into a pastry shop in Thessaloniki. Behind the glass are trays of golden Baklava, delicate phyllo pastries, cookies, and sweets prepared using recipes passed down through generations. You order a small piece and a strong cup of coffee. Outside, the city moves along the waterfront. The first bite is crisp, buttery, nutty, and sweet with honey. For a moment, you are not simply visiting Greece. You

Read More »

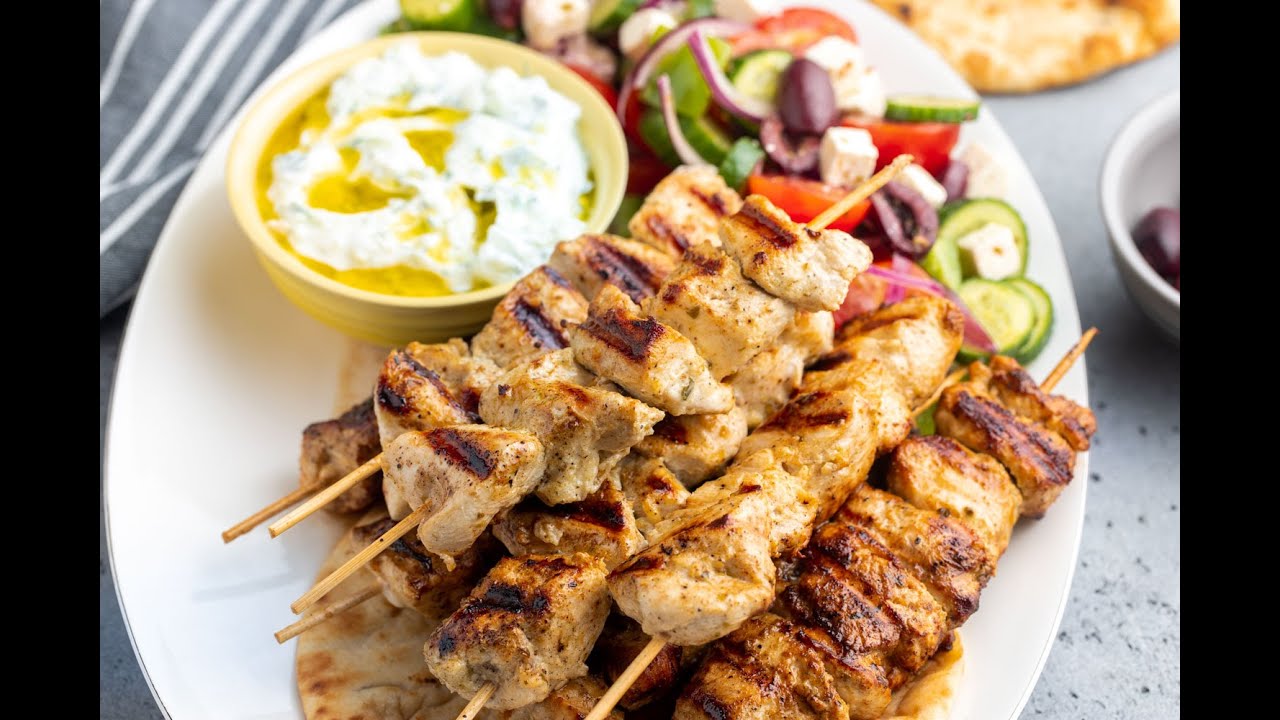
Chicken Souvlaki

The Story Behind the Dish Souvlaki is one of Greece’s most popular and approachable foods. The word refers to small pieces of meat cooked on a skewer. It can be served directly from the grill, wrapped in warm pita, or arranged on a platter with vegetables, rice, lemon, and tzatziki. It is equally at home in a casual street-side shop and at a family dinner table. The secret is the marinade. Olive oil, lemon, garlic, and oregano create the fresh, unmistakable flavors associated with Greek cooking. The chicken absorbs those flavors before being grilled until lightly charred and juicy. Souvlaki is simple, social, and easy to personalize—making it ideal for families, gatherings, and warm-weather meals. Why This Dish Matters Souvlaki demonstrates that memorable food does not need to be complicated. Fresh ingredients, a hot grill, and a generous table are enough. It also allows everyone to build a meal that suits them. Some guests may prefer a pita wrap. Others may choose a salad or rice bowl. Children can enjoy the grilled chicken with simple sides, while adventurous diners can add onions, herbs, feta, olives, and extra tzatziki. Recipe at a Glance Preparation Time: 20 minutes Marinating Time: 30 minutes to 2 hours Cooking Time: 10–12 minutes Total Time: Approximately 1 hour Difficulty: Easy Servings: 4 Ingredients For the Chicken 1½ pounds boneless, skinless chicken breasts or thighs ¼ cup extra-virgin olive oil 3 tablespoons fresh lemon juice 3 garlic cloves, minced 1 tablespoon dried oregano 1 teaspoon kosher salt ½ teaspoon freshly ground black pepper ½ teaspoon smoked paprika, optional For Serving 4 warm pita breads 1 cup prepared tzatziki sauce 1 cup chopped cucumber 1 cup chopped tomatoes ½ red onion, thinly sliced ½ cup crumbled feta cheese Lemon wedges Fresh parsley or dill Kalamata olives, optional Preparation Step 1 – Cut the Chicken Cut the chicken into pieces approximately 1½ inches in size. Keeping the pieces similar in size helps them cook evenly. Step 2 – Prepare the Marinade In a large bowl, whisk together: Olive oil Lemon juice Garlic Oregano Salt Pepper Smoked paprika, if using Add the chicken and toss until every piece is coated. Cover and refrigerate for at least 30 minutes. For stronger flavor, marinate for up to 2 hours. Avoid marinating overnight because the lemon juice can begin changing the chicken’s texture. Step 3 – Prepare the Skewers If using wooden skewers, soak them in water for approximately 30 minutes. Thread the chicken onto the skewers, leaving a small amount of space between the pieces. Do not pack them too tightly. Step 4 – Grill the Chicken Preheat an outdoor grill or grill pan over medium-high heat. Lightly oil the cooking surface. Grill the skewers for 10–12 minutes, turning every few minutes. Cook until the chicken is lightly charred and reaches an internal temperature of 165°F. Remove from the grill and allow to rest for 3–5 minutes. Step 5 – Warm the Pita Warm pita bread on the grill for approximately 30 seconds per side. Keep covered in a clean kitchen towel until ready to serve. Step 6 – Assemble Serve the chicken directly on skewers or remove it for pita wraps. Add: Tzatziki Cucumber Tomato Red onion Feta Herbs Lemon juice Chef’s Notes Chicken thighs provide the juiciest result and are more forgiving on the grill. Chicken breast is leaner but should be watched carefully to prevent overcooking. The finished chicken should be lightly charred outside and moist inside. Garnishing & Presentation Arrange the skewers on a large serving platter. Surround them with: Lemon wedges Tomato and cucumber Warm pita Bowl of tzatziki Feta cheese Olives Fresh herbs This creates a colorful, family-style presentation that encourages everyone to build their own plate. Suggested Pairings Wine Assyrtiko Sauvignon Blanc Dry rosé Family-Friendly Fresh lemonade Cucumber water Sparkling mineral water Iced tea with lemon 5-Minute Travel Version Use rotisserie chicken or prepared grilled chicken strips. Warm them in a skillet with: Olive oil Lemon juice Dried oregano Garlic powder Serve with store-bought pita, tzatziki, chopped vegetables, and feta. Gregg’s Passport Notes  Santorini is famous for sunsets, but its greatest pleasures often happen before the sun reaches the horizon. Explore a village on foot. Stop at a small café. Taste the tomatoes, olives, cheeses, seafood, and wines produced on the island. Leave room in your itinerary for moments that are not scheduled. A simple lunch overlooking the Aegean Sea may become one of the most memorable parts of the entire trip. Where to Experience This Dish Athens and the Greek Islands Souvlaki shops can be found throughout Greece. In Athens, it is a favorite quick meal. On the islands, grilled meats are often served with fresh vegetables, lemon, pita, and views that make even the simplest lunch feel extraordinary. Central Texas Picks Greek and Mediterranean restaurants across the Waco–Temple–Killeen corridor often serve chicken skewers, gyro platters, pita wraps, hummus, and tzatziki. Alpha Omega Grill & Bakery – Waco (2 locations) D’s Mediterranean Grill – Waco Tillie Marie’s Comfort Food – Killeen The Gin at Nolan Creek – Belton Acropolis – Harker Heights  Turn This Recipe Into Your Next Vacation Imagine sitting on a terrace overlooking the Aegean Sea. The sky is beginning to change color. A platter arrives with grilled chicken, warm pita, cool tzatziki, tomatoes, feta, olives, and lemon. The meal is uncomplicated. The setting is unforgettable. That is one of the great joys of Greece. When you’re ready to experience Santorini, Athens, Crete, or another unforgettable Greek destination, Travel-a-Go-Go Travel would be honored to plan your journey. Dream Trips. Done Deals. Relax…We’ve Got This!

Read More »

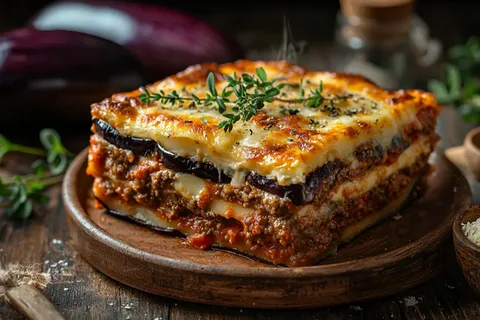
Moussaka

The Story Behind the Dish Moussaka is one of Greece’s most recognizable comfort foods. The dish is built in layers: tender roasted eggplant, a deeply seasoned meat and tomato sauce, and a smooth béchamel topping baked until golden. The result is hearty enough for a family meal yet elegant enough to serve for a special occasion. Versions of layered eggplant dishes appear throughout the eastern Mediterranean and Middle East. The Greek version most people recognize today became especially popular during the twentieth century, when creamy béchamel was added to create its distinctive top layer. Like many beloved recipes, Moussaka varies from one family to another. Some cooks add potatoes beneath the eggplant. Others use zucchini. Ground lamb offers a traditional flavor, while ground beef creates a milder version that is often more familiar to American families. No matter the variation, Moussaka reflects something central to Greek cooking: humble ingredients prepared with patience and shared generously. Why This Dish Matters Moussaka represents the kind of meal that brings people together. It is not rushed food. The vegetables are roasted, the sauce is allowed to develop, and the finished casserole rests before it is served. Every layer contributes something different—earthiness from eggplant, warmth from cinnamon and oregano, richness from meat, and creaminess from béchamel. It is a complete culinary experience in a single dish. Recipe at a Glance Preparation Time: 40 minutes Cooking Time: 55–65 minutes Resting Time: 15 minutes Total Time: Approximately 1 hour 50 minutes Difficulty: Moderate Servings: 6–8 Ingredients For the Eggplant Layer 2 large eggplants 2 tablespoons extra-virgin olive oil 1 teaspoon kosher salt, divided ¼ teaspoon freshly ground black pepper For the Meat Sauce 1 pound ground lamb or ground beef 1 medium yellow onion, finely diced 3 garlic cloves, minced 1 can crushed tomatoes, 14–15 ounces 2 tablespoons tomato paste ½ cup dry red wine or beef broth 1 teaspoon dried oregano ½ teaspoon ground cinnamon ¼ teaspoon ground allspice, optional ½ teaspoon kosher salt ¼ teaspoon freshly ground black pepper 1 tablespoon extra-virgin olive oil For the Béchamel 4 tablespoons unsalted butter ¼ cup all-purpose flour 2½ cups whole milk, warmed ¼ teaspoon ground nutmeg ½ teaspoon kosher salt ¼ teaspoon white or black pepper ½ cup grated Parmesan or kefalotyri cheese 1 large egg, lightly beaten Preparation Step 1 – Prepare the Eggplant Preheat the oven to 400°F. Slice the eggplants into rounds approximately ¼-inch thick. Arrange the slices on baking sheets lined with parchment paper. Brush both sides lightly with olive oil and season with salt and pepper. Roast for 18–22 minutes, turning once, until the eggplant is tender and lightly golden. Remove from the oven and set aside. Step 2 – Prepare the Meat Sauce Heat one tablespoon of olive oil in a large skillet over medium heat. Add the diced onion and cook for approximately 4 minutes, until softened. Add the garlic and cook for 30 seconds. Add the ground lamb or beef. Break the meat apart with a spoon and cook until browned. Drain excess fat if necessary. Stir in: Crushed tomatoes Tomato paste Red wine or broth Oregano Cinnamon Allspice Salt Pepper Reduce the heat and simmer uncovered for 15–20 minutes. The sauce should become thick rather than watery. Remove from the heat. Step 3 – Prepare the Béchamel Melt the butter in a medium saucepan over medium heat. Whisk in the flour. Cook for approximately one minute, whisking continuously. Slowly pour in the warm milk while continuing to whisk. Cook for 5–7 minutes until the sauce becomes smooth and thick enough to coat the back of a spoon. Remove from the heat. Stir in: Nutmeg Salt Pepper Grated cheese Allow the sauce to cool for approximately 5 minutes. Slowly whisk in the beaten egg. Adding the egg after the sauce cools slightly prevents it from scrambling. Step 4 – Assemble the Moussaka Reduce the oven temperature to 375°F. Lightly grease a 9 x 13-inch baking dish. Arrange half of the roasted eggplant in an even layer. Spread the meat sauce across the eggplant. Top with the remaining eggplant slices. Pour the béchamel over the top and spread it evenly to the edges. Sprinkle with a small amount of additional grated cheese if desired. Step 5 – Bake Bake uncovered for 35–45 minutes. The top should be golden and lightly puffed. Remove from the oven and allow the Moussaka to rest for at least 15 minutes before slicing. This resting time allows the layers to settle and makes serving much easier. Chef’s Notes Moussaka should hold its shape when sliced. If the meat sauce is too thin or the casserole is cut immediately after baking, the layers may slide apart. Roasting the eggplant instead of frying it also creates a lighter dish while preserving its traditional flavor. Garnishing & Presentation Serve in square portions on warmed plates. Finish with: Fresh chopped parsley Light sprinkle of grated cheese Small pinch of cinnamon, optional Serve with: Greek salad Warm pita bread Lemon-roasted potatoes Steamed green vegetables Suggested Pairings Wine Agiorgitiko Xinomavro Cabernet Sauvignon Family-Friendly Sparkling water with lemon Pomegranate juice Fresh-brewed iced tea 5-Minute Travel Version Use frozen roasted eggplant or prepared grilled vegetables. Layer them with: Jarred meat sauce Ground beef or lamb Prepared Alfredo or béchamel-style sauce Grated Parmesan Bake until heated through and golden on top. It will not duplicate traditional Moussaka, but it offers many of the same comforting flavors on a busy evening. Gregg’s Passport Notes  Athens is a city where the ancient and modern worlds constantly meet. You can stand beneath the Acropolis in the afternoon, explore a neighborhood market before dinner, and end the evening at a family-run taverna where recipes have been passed down for generations. Greek meals are rarely hurried. Allow time to enjoy the food, the conversation, and the people around you. Some of the best travel memories are not created while rushing from one attraction to another. They happen when you slow down long enough to feel part of the destination. Where to Experience This Dish Athens,

Read More »

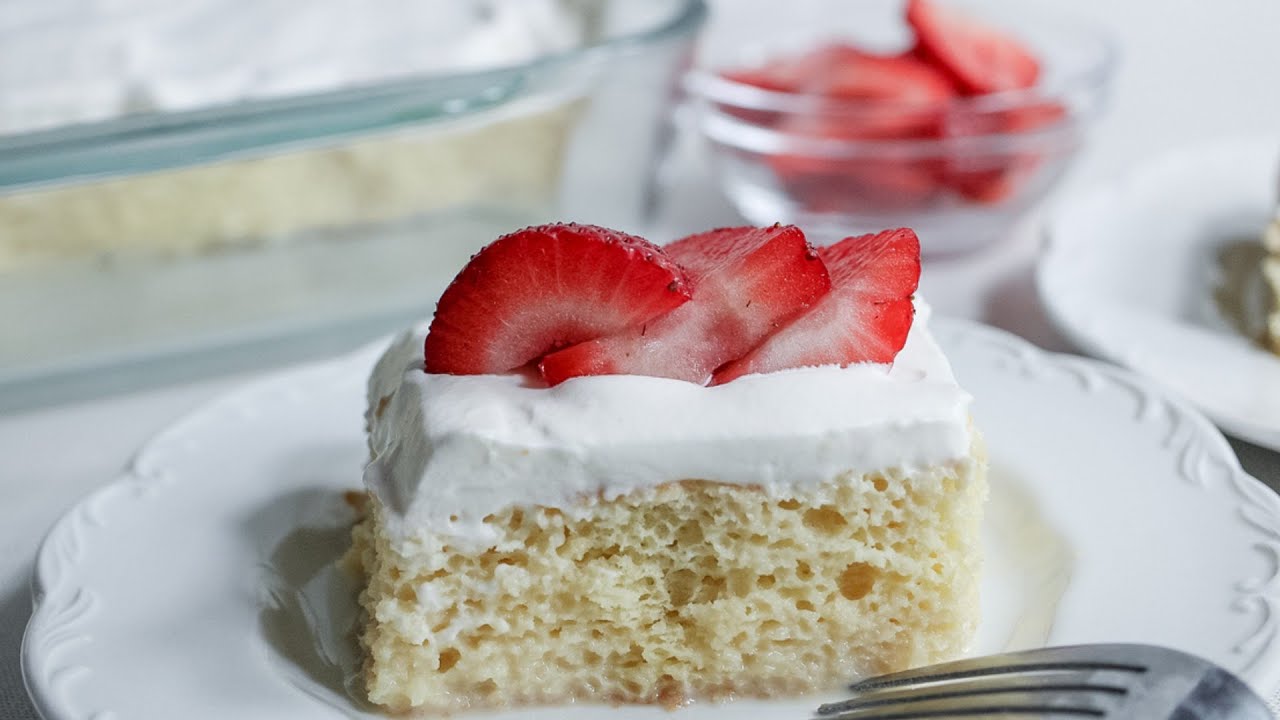
Tres Leches Cake

Bringing the World We’ve Traveled…to Your Dining Table. The Story Behind the Dish Tres Leches Cake is a light sponge cake soaked in a mixture of three milks and topped with softly whipped cream. Its name means “three milks,” referring to the traditional combination of evaporated milk, sweetened condensed milk, and whole milk or cream. The dessert is enjoyed throughout Mexico and across Latin America. It frequently appears at birthday celebrations, weddings, holidays, family gatherings, and restaurant tables. What makes Tres Leches Cake so memorable is its texture. The sponge cake absorbs the milk mixture while remaining light enough to hold its shape. The result is rich and moist without becoming heavy. Fresh fruit, cinnamon, toasted coconut, or chocolate may be added, but the classic combination of milk-soaked sponge cake and whipped cream remains the heart of the dessert. Why This Dish Matters Tres Leches Cake reflects the celebratory side of the Mexican table. It is usually made to be shared. The dessert is large enough for a gathering, easy to decorate, and even better after chilling for several hours. It also demonstrates how simple pantry ingredients can become something elegant when prepared with care. Recipe at a Glance Preparation Time: 25 minutes Cooking Time: 25–30 minutes Chilling Time: Minimum 4 hours Total Time: Approximately 5 hours Difficulty: Easy to Moderate Servings: 12 Ingredients For the Sponge Cake 1 cup all-purpose flour 1½ teaspoons baking powder ¼ teaspoon kosher salt 5 large eggs, separated 1 cup granulated sugar, divided ⅓ cup whole milk 1 teaspoon pure vanilla extract For the Three-Milk Soak 1 can evaporated milk, 12 ounces 1 can sweetened condensed milk, 14 ounces ½ cup whole milk or heavy cream 1 teaspoon vanilla extract, optional For the Whipped Topping 1½ cups heavy whipping cream 3 tablespoons powdered sugar 1 teaspoon vanilla extract For Garnishing Fresh strawberries or mixed berries Ground cinnamon Toasted coconut, optional Fresh mint, optional Preparation Step 1: Prepare the Oven and Pan Preheat the oven to 350°F. Lightly grease a 9-by-13-inch baking dish. Dust the pan lightly with flour or line the bottom with parchment paper. Step 2: Combine the Dry Ingredients In a medium bowl, whisk together: All-purpose flour Baking powder Salt Set the mixture aside. Step 3: Beat the Egg Yolks Place the egg yolks in a large mixing bowl. Add ¾ cup of the granulated sugar. Using an electric mixer, beat the yolks and sugar for approximately 3–4 minutes, or until the mixture becomes pale, thick, and creamy. Stir in the whole milk and vanilla extract. Add the flour mixture and stir gently until just combined. Do not overmix. Step 4: Beat the Egg Whites Place the egg whites in a separate clean, grease-free bowl. Beat the whites until soft peaks begin to form. Gradually add the remaining ¼ cup of granulated sugar. Continue beating until stiff, glossy peaks form. Step 5: Fold the Mixtures Together Fold approximately one-third of the beaten egg whites into the yolk and flour mixture. This first addition will lighten the batter. Gently fold in the remaining egg whites in two additions. Use a large spatula and fold from the bottom of the bowl upward. Avoid stirring aggressively or deflating the egg whites. Step 6: Bake the Cake Pour the batter into the prepared baking dish and spread it evenly. Bake for approximately 25–30 minutes, or until the top is lightly golden and a toothpick inserted into the center comes out clean. Remove the cake from the oven and allow it to cool completely in the baking dish. Step 7: Prepare the Three-Milk Mixture In a large measuring cup or bowl, whisk together: Evaporated milk Sweetened condensed milk Whole milk or heavy cream Vanilla extract, if using Continue whisking until the mixture is smooth and evenly combined. Step 8: Soak and Chill the Cake Using a fork, wooden skewer, or toothpick, poke holes over the entire surface of the cooled cake. Slowly pour the three-milk mixture over the cake, allowing the liquid to absorb gradually. Pay particular attention to the corners and edges. Cover the baking dish and refrigerate the cake for at least 4 hours. For the best flavor and texture, allow the cake to chill overnight. Step 9: Prepare the Whipped Topping Place the heavy whipping cream, powdered sugar, and vanilla extract in a chilled mixing bowl. Beat until medium peaks form. The whipped cream should hold its shape while remaining soft and spreadable. Spread the whipped topping evenly over the chilled cake. Step 10: Garnish and Serve Decorate the cake with fresh strawberries or mixed berries. Finish with a light dusting of ground cinnamon. Add toasted coconut or fresh mint, if desired. Slice the cake into squares and serve cold. Chef’s Notes The egg whites provide the structure that allows the cake to absorb the milk mixture without collapsing. Fold the egg whites gently into the batter. Overmixing will remove the air and create a heavier cake. Allow the cake to cool completely before adding the milk mixture. Pour the milk slowly and evenly so it reaches the center, corners, and edges. The cake should be thoroughly chilled before serving. Tres Leches Cake often tastes even better the following day, making it an excellent make-ahead dessert. Store the cake covered in the refrigerator. Garnishing and Presentation Cut the chilled cake into neat squares and serve it on chilled dessert plates. Finish each piece with: A fresh strawberry or several mixed berries A small dusting of cinnamon A light drizzle of sweetened condensed milk, optional A mint leaf, optional For a birthday, anniversary, or other celebration, decorate the entire cake with berries arranged around the outer edges. Suggested Pairings Wine Moscato Late-harvest Riesling Sparkling wine Coffee Café de olla Espresso Cinnamon coffee Family-Friendly Beverages Cold milk Mexican hot chocolate Strawberry agua fresca Cinnamon tea 5-Minute Travel Version Use prepared pound cake, sponge cake, or angel-food cake. Cut the cake into individual portions and poke each piece several times with a fork. Mix together evaporated milk, sweetened condensed milk, and whole milk. Spoon the mixture
Read More »

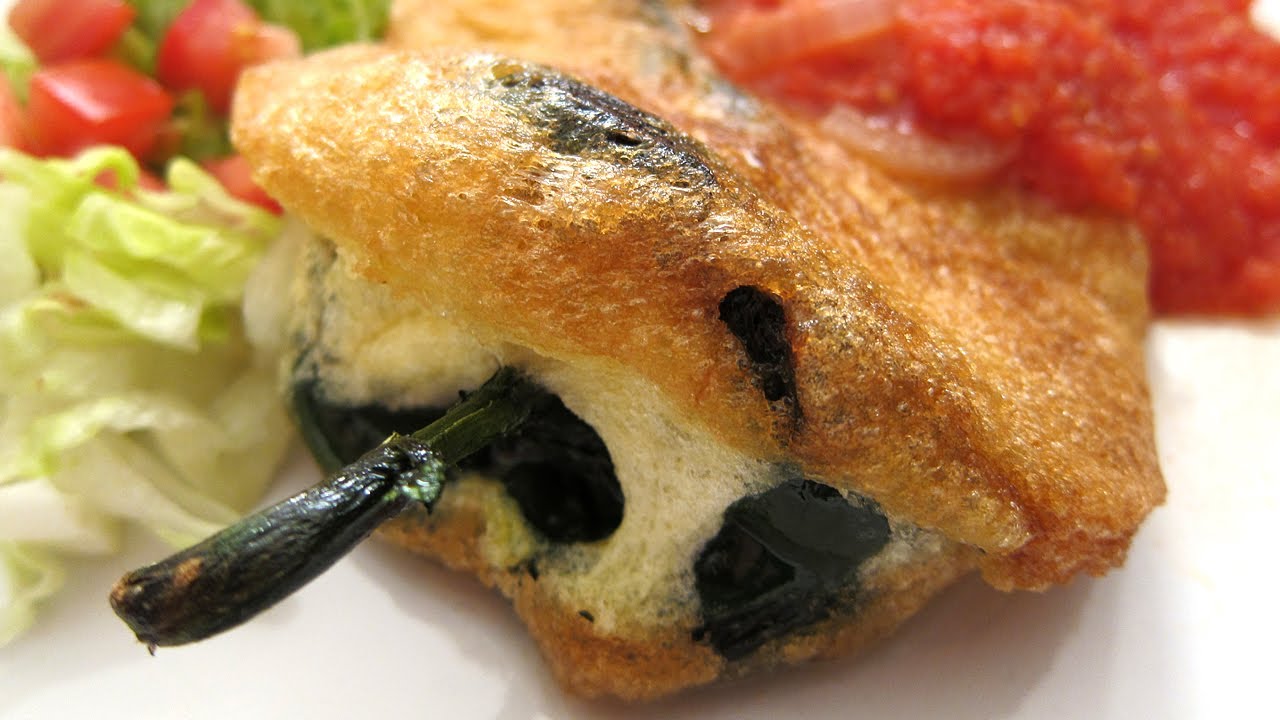
Chiles Rellenos

Bringing the World We’ve Traveled…to Your Dining Table. The Story Behind the Dish Chiles Rellenos are roasted peppers filled with cheese, meat, vegetables, or other ingredients and served with a flavorful sauce. The name simply means “stuffed chiles.” Poblano peppers are commonly used because they have a deep, earthy flavor and generally provide gentle heat rather than overwhelming spice. The peppers are roasted until their skins become blistered, peeled, filled, and often coated in a light egg batter before being fried until golden. Puebla, one of Mexico’s most historically and culturally important food destinations, is closely associated with elaborate stuffed-chile dishes and carefully layered sauces. This version uses cheese for a comforting filling and a gently seasoned tomato sauce that complements the roasted poblano without overpowering it. Why This Dish Matters Chiles Rellenos demonstrate the balance found in traditional Mexican cooking. The poblano brings earthiness and gentle heat. The cheese adds richness. The egg coating creates lightness. The tomato sauce provides acidity and warmth. The dish may look impressive, but each step is manageable when approached slowly. It also offers flexibility. Meat, vegetables, beans, seafood, and different cheeses can all be used as fillings. Recipe at a Glance Preparation Time: 35 minutes Cooking Time: 25–30 minutes Total Time: Approximately 1 hour Difficulty: Moderate Servings: 4 Ingredients For the Stuffed Peppers 4 large poblano peppers 8 ounces Oaxaca cheese, Monterey Jack, or quesillo ½ cup all-purpose flour 4 large eggs, separated ½ teaspoon kosher salt ¼ teaspoon freshly ground black pepper Vegetable oil for shallow frying For the Tomato Sauce 1 tablespoon vegetable oil ½ medium yellow onion, finely diced 2 garlic cloves, minced 1 can tomato sauce, 15 ounces ½ cup chicken or vegetable broth ½ teaspoon ground cumin ½ teaspoon dried Mexican oregano ¼ teaspoon kosher salt Pinch of black pepper For Garnishing Mexican crema or sour cream Crumbled queso fresco Chopped cilantro Sliced avocado, optional Preparation Step 1: Roast the Poblano Peppers Roast the peppers directly over a gas flame, beneath a hot broiler, or on an outdoor grill. Turn the peppers frequently until their skins are blistered and blackened on all sides. Place the roasted peppers in a covered bowl or sealed paper bag and allow them to steam for 10–15 minutes. The steam will loosen the skins and make the peppers easier to peel. Step 2: Peel and Clean the Peppers Remove the peppers from the bowl. Using your fingers or a paper towel, carefully peel away the loosened outer skins. Avoid rinsing the peppers under running water because that can remove some of their roasted flavor. Cut a small slit lengthwise along one side of each pepper. Carefully remove the seeds and interior membranes while keeping the peppers as intact as possible. Step 3: Fill the Peppers Cut the cheese into strips that will fit inside the poblanos. Gently fill each pepper with approximately 2 ounces of cheese. Close the opening around the cheese. Secure the pepper with one or two toothpicks when necessary. Set the stuffed peppers aside while preparing the sauce and batter. Step 4: Prepare the Tomato Sauce Heat 1 tablespoon of vegetable oil in a saucepan over medium heat. Add the diced onion and cook for approximately 3–4 minutes, or until softened and translucent. Add the minced garlic and cook for approximately 30 seconds. Stir in: Tomato sauce Chicken or vegetable broth Ground cumin Mexican oregano Salt Black pepper Bring the sauce to a gentle simmer. Cook for 10–12 minutes, stirring occasionally. Reduce the heat to low and keep the sauce warm while preparing the peppers. Step 5: Make the Egg Batter Place the egg whites in a clean, grease-free mixing bowl. Using an electric mixer, beat the egg whites until stiff peaks form. In a separate small bowl, whisk the egg yolks with the salt and black pepper. Gently fold the yolks into the beaten egg whites. Fold only until combined. Do not overmix or the batter will lose its volume. Step 6: Flour the Peppers Place the flour on a shallow plate. Lightly coat each stuffed pepper in flour and gently shake away the excess. The thin flour coating helps the egg batter adhere to the surface of the pepper. Step 7: Batter and Fry Pour approximately ½ inch of vegetable oil into a large skillet. Heat the oil over medium-high heat. Dip each floured pepper into the egg batter, coating it carefully on all sides. Place the battered pepper into the hot oil. Fry for approximately 2–3 minutes per side, or until the coating is puffed and golden brown. Transfer the cooked pepper to a paper-towel-lined plate and allow excess oil to drain. Remove any toothpicks before serving. Step 8: Sauce and Serve Spoon a pool of warm tomato sauce onto each plate. Place one Chile Relleno over the sauce. Finish with Mexican crema, crumbled queso fresco, chopped cilantro, avocado, or a combination of these garnishes. Serve immediately while the cheese is warm and melted. Chef’s Notes The heat level of poblano peppers can vary. Most are relatively mild, but an occasional pepper may be noticeably hotter. Wash your hands thoroughly after removing the seeds and membranes, and avoid touching your eyes. The bowl and beaters used for the egg whites must be completely clean and free from oil or grease. Fold the egg yolks into the whites gently so the batter remains light and airy. Keep the oil hot enough to cook the batter quickly, but not so hot that the exterior browns before the cheese becomes warm. For a lighter version, skip the egg batter and frying. Place the stuffed peppers in a baking dish with the tomato sauce and bake until heated through and the cheese has melted. Garnishing and Presentation Serve each Chile Relleno over a pool of the warm tomato sauce. Finish with: A thin drizzle of Mexican crema Crumbled queso fresco Fresh cilantro Sliced avocado A lime wedge Traditional accompaniments may include: Mexican rice Refried beans or black beans Warm corn tortillas A simple green salad Suggested
Read More »

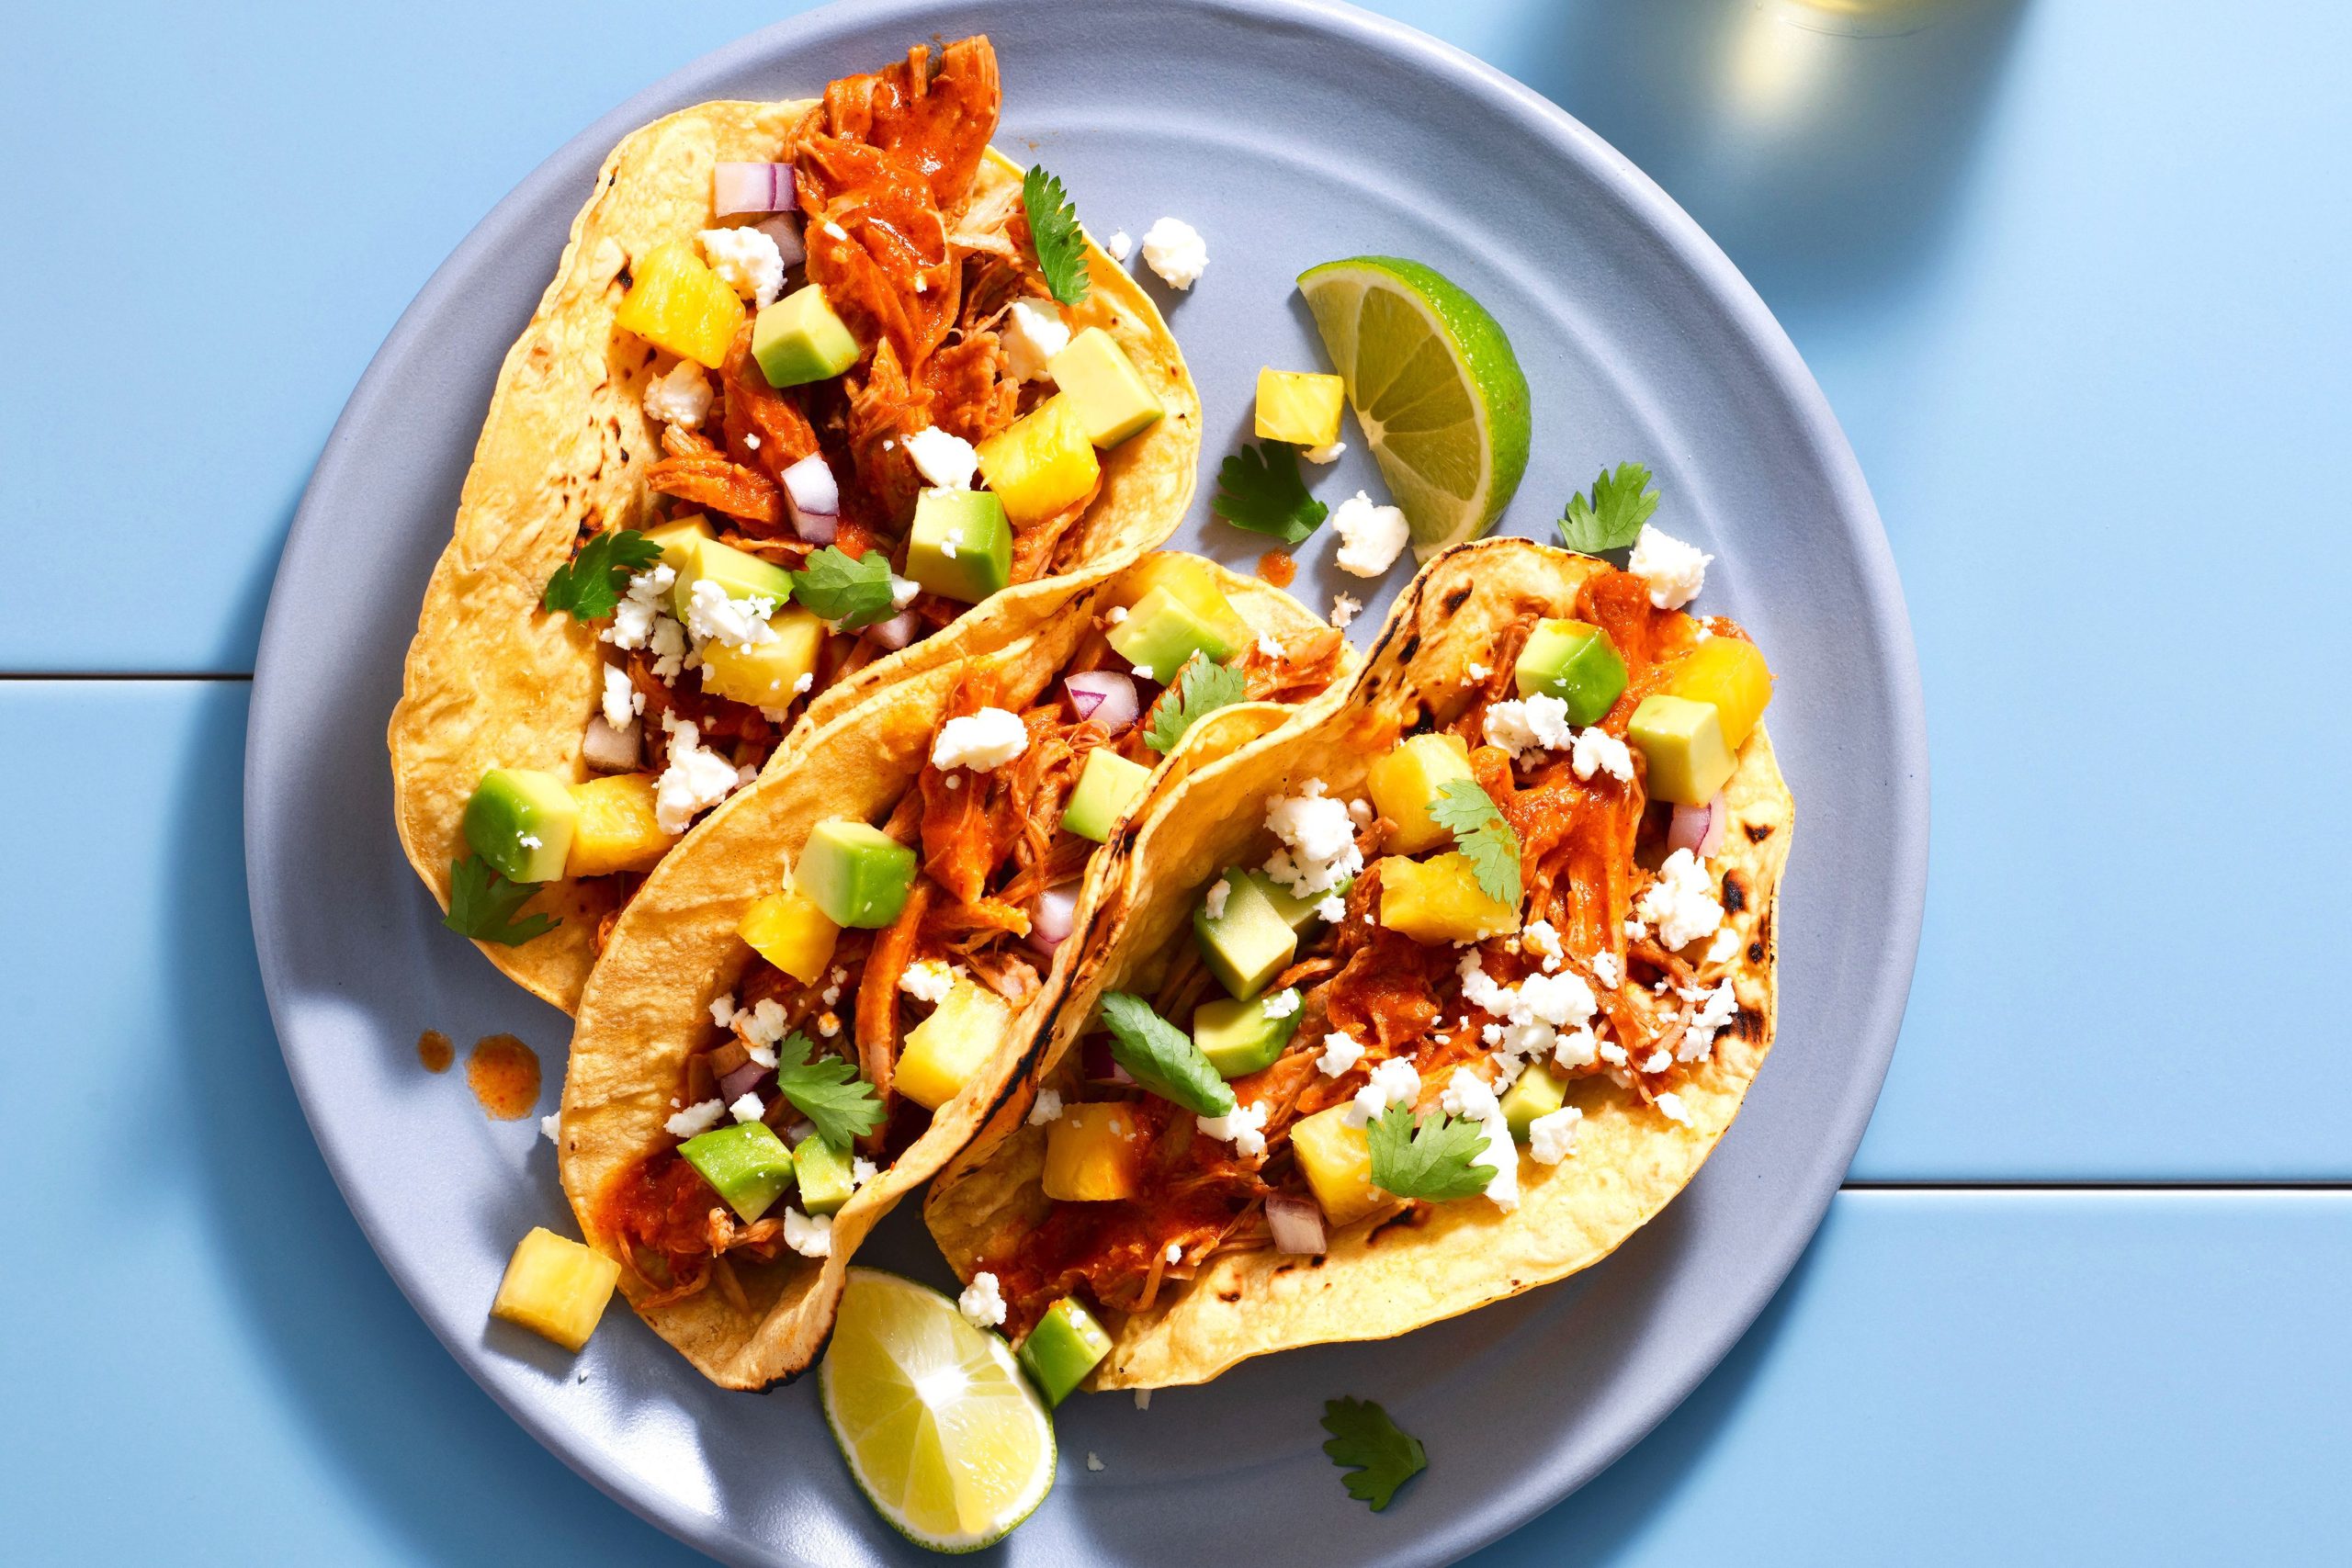
Tacos al Pastor

Bringing the World We’ve Traveled…to Your Dining Table. The Story Behind the Dish Tacos al Pastor are among Mexico’s most recognizable and beloved street foods. Thin slices of pork are marinated with chiles, spices, achiote, citrus, and pineapple before being cooked until caramelized and lightly charred. The traditional cooking method reflects the influence of Lebanese immigrants who arrived in Mexico during the late nineteenth and early twentieth centuries. They brought with them the technique of roasting seasoned meat on a vertical spit. Mexican cooks transformed that technique by using pork, local chiles, achiote, corn tortillas, onions, cilantro, salsa, lime, and pineapple. The result is a dish that represents both cultural exchange and unmistakably Mexican flavor. In traditional taquerías, the pork is stacked on a vertical spit called a trompo. The outside caramelizes as it turns beside the heat, and the cook slices the browned meat directly onto small corn tortillas. This home version recreates those flavors with a skillet or grill pan. Why This Dish Matters Tacos al Pastor tell a larger story about Mexican cuisine. They demonstrate how cultures can meet, adapt, and create something entirely new. They are also wonderfully social. The pork, tortillas, pineapple, onions, cilantro, salsa, and lime can be placed in the center of the table so everyone can assemble a taco exactly the way they like it. For families and first-time cooks, the dish feels exciting and adventurous while remaining familiar and approachable. Recipe at a Glance Preparation Time: 25 minutes Marinating Time: 2–4 hours Cooking Time: 15–20 minutes Total Time: Approximately 3 hours, including marinating Difficulty: Moderate Servings: 4–6 Ingredients For the Pork and Marinade 1½ pounds boneless pork shoulder or pork loin 3 tablespoons achiote paste 2 tablespoons apple-cider vinegar ¼ cup pineapple juice 2 tablespoons fresh orange juice 2 garlic cloves, minced 1 tablespoon ancho chile powder 1 teaspoon ground cumin 1 teaspoon dried Mexican oregano ½ teaspoon smoked paprika ½ teaspoon kosher salt ¼ teaspoon freshly ground black pepper 1 tablespoon neutral cooking oil For the Tacos 1 cup fresh pineapple, diced 8–12 small corn tortillas ½ white onion, finely diced ½ cup fresh cilantro, chopped Salsa verde or salsa roja Lime wedges Sliced radishes, optional Crumbled queso fresco, optional Preparation Step 1: Slice the Pork Place the pork in the freezer for approximately 20–30 minutes. The meat should become firm but should not freeze completely. Using a sharp knife, slice the pork across the grain into thin strips approximately ¼-inch thick. Thin slices will absorb the marinade more evenly and cook quickly. Step 2: Prepare the Marinade In a large nonreactive bowl, whisk together: Achiote paste Apple-cider vinegar Pineapple juice Orange juice Minced garlic Ancho chile powder Ground cumin Mexican oregano Smoked paprika Salt Black pepper Continue whisking until the achiote paste is evenly incorporated. Add the sliced pork and turn the pieces until every surface is coated with the marinade. Cover the bowl and refrigerate for at least 2 hours and up to 4 hours. Step 3: Caramelize the Pineapple Heat a large skillet or grill pan over medium-high heat. Add the diced pineapple and cook for approximately 3–4 minutes, stirring occasionally, until lightly browned and caramelized around the edges. Transfer the pineapple to a small bowl and set it aside. Step 4: Cook the Pork Return the skillet to medium-high heat and add the neutral cooking oil. Remove the pork from the marinade, allowing excess marinade to drip back into the bowl. Cook the pork in batches so the skillet does not become overcrowded. Cook each batch for approximately 3–4 minutes per side, or until the pork is browned, lightly charred, and cooked through. Transfer the cooked pork to a cutting board. Allow it to rest for several minutes and then chop it into small, taco-sized pieces. Step 5: Warm the Tortillas Warm the corn tortillas in a dry skillet for approximately 20–30 seconds per side. They may also be warmed briefly over a low gas flame, using tongs and turning them frequently. Keep the tortillas covered with a clean kitchen towel until ready to serve. Step 6: Assemble the Tacos Place a portion of the chopped pork in the center of each tortilla. Top with: Caramelized pineapple Diced white onion Chopped cilantro Salsa verde or salsa roja A squeeze of fresh lime juice Add sliced radishes or crumbled queso fresco, if desired. Serve immediately while the pork and tortillas are warm. Chef’s Notes Achiote paste is essential to the traditional color and flavor of Tacos al Pastor. It can often be found in larger grocery stores, international markets, or Mexican markets. Do not overcrowd the skillet. Cooking the pork in batches allows it to brown instead of steaming. For additional char, place the cooked pork beneath the broiler for 1–2 minutes before chopping. Pork shoulder provides the richest flavor, while pork loin creates a leaner version. Fresh pineapple provides better texture than canned pineapple, but well-drained canned pineapple may be used when necessary. Taste the salsa before adding a large amount. Some Mexican salsas can be considerably hotter than expected. Garnishing and Presentation Arrange the tacos on a large serving platter. Surround them with: Lime wedges Thinly sliced radishes Small bowls of salsa Fresh cilantro Diced white onion Extra caramelized pineapple For a casual gathering, place all the ingredients in separate bowls and allow everyone to build their own tacos. Serve the tacos immediately while the tortillas remain warm and flexible. Suggested Pairings Wine Dry Riesling Sauvignon Blanc Sparkling rosé The acidity and freshness of these wines complement the pineapple, citrus, chile, and rich pork. Beer Mexican lager Pilsner Light amber beer Cocktails Classic margarita Paloma Family-Friendly Beverages Pineapple agua fresca Lime sparkling water Mexican-style fruit punch Horchata 5-Minute Travel Version Use prepared carnitas, shredded pork, or chopped rotisserie pork. Warm the meat in a skillet with a splash of pineapple juice, ancho chile powder, ground cumin, and your favorite salsa. Serve the pork in warm corn tortillas and top with diced pineapple, onion, cilantro, salsa, and lime. It will not duplicate
Read More »

Taste of Tuscany, Italy

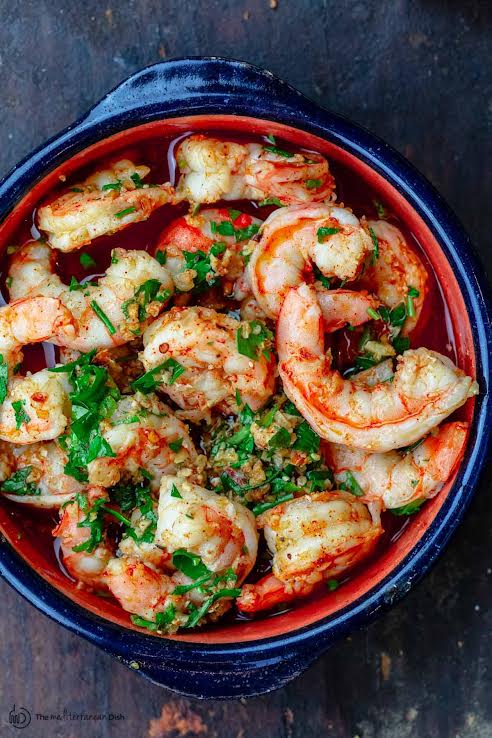
GAMBAS AL AJILLO (Spanish Garlic Shrimp)

Savoring the Spirit of Greece

This Week, Travelagogo’s Global Kitchen Has Been in Morocco, Be Sure To Join Us Next Week In EGYPT. 3 New Recipes You Can Make At Home, And Where You Can Try Them Locally. See You Next Week!